Finchley Tile Cleaning

Finchley Tile Cleaning

Welcome to my Work History archive where you will find examples of the cleaning and renovation of tiles carried out in Finchley.

Pitted Travertine Tiled Kitchen Floor Renovation East Finchley N2

Pitted and Dirty Travertine Kitchen Floor Renovated in East Finchley

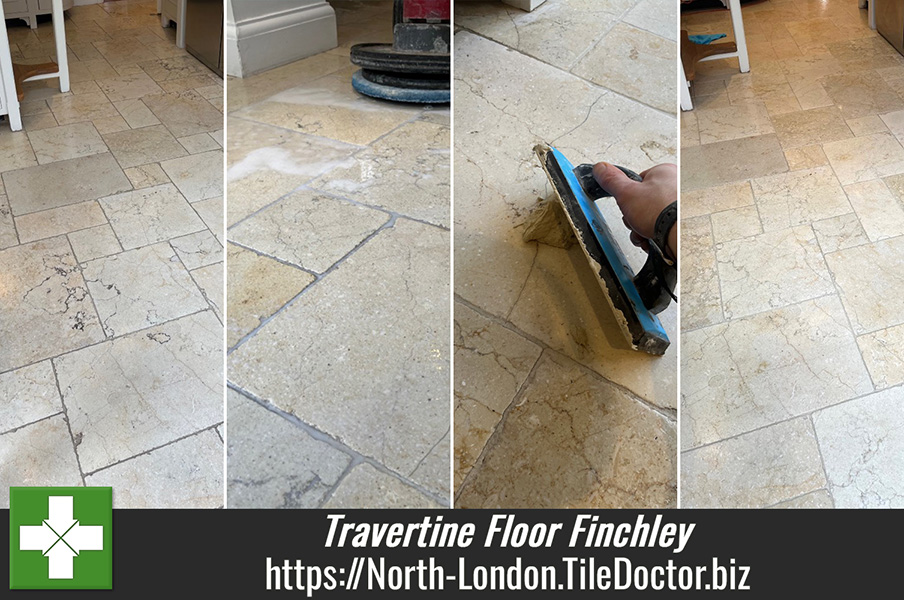
Here we have a travertine floor that was installed in the kitchen of a property in East Finchley around 17 years prior. Over the years some of the grout had become loose and the sealer had worn off allowing dirt to get into the pits of the tiles. The stone and grout were now getting very dirty, and the client was struggling to keep it clean. The floor now needed renovation and I was asked to recommend a solution.
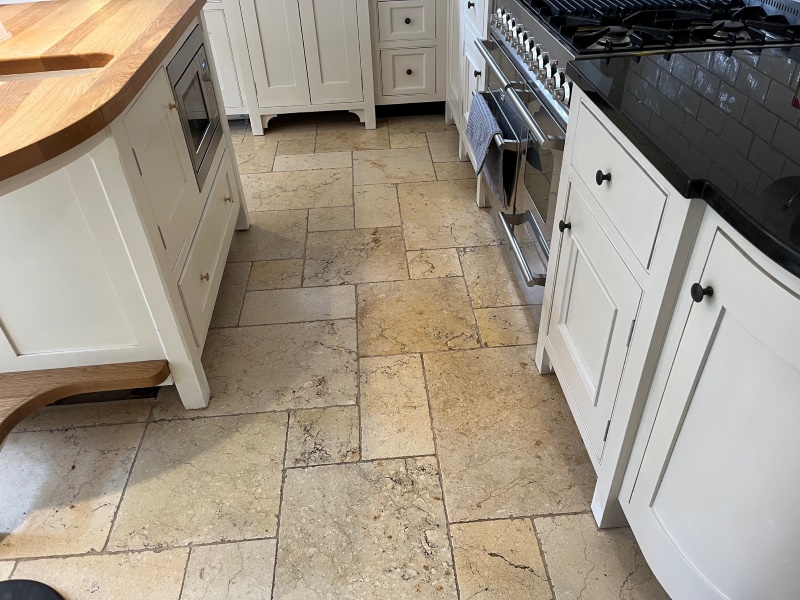
Travertine Tiled Floor Before Renovation East Finchley N2

I visited the property to survey the floor, assess the issues and come up with a plan for its renovation using a set of diamond burnishing pads. From the plan I was able to email a detailed quotation over to the client which was accepted and a date agreed for the work to being.

Cleaning and Repairing a Travertine Tiled Kitchen

On the first day work started with the application of a 400-grit burnishing pad which was worked into the travertine using a floor buffer and water for lubrication. The floor was then rinsed and the slurry extracted with a wet vacuum. This process was then repeated with an 800 and then 1500 grit pad again extracting the soiling with a wet vacuum after each pad.

Travertine Tiled Floor During Renovation East Finchley N2

After working through the pads, the grout was then cleaned using Tile Doctor Pro-Clean scrubbed in with a handheld brush. I find this is the best method to get the dirt out of the grout, I also used it to get into the recessed of the pitted stone to ensure the floor was as clean as it could be.

Travertine Tiled Floor During Cleaning East Finchley N2

Once happy the floor was rinsed with water and extracted several times to remove any trace of Tile Doctor Pro-Clean and loose dirt.

Sealing a Travertine Tiled Kitchen

Once the Travertine was dry, I set about refilling the loose grout and pitting in the tiles with jasmine grout (a colour that tends to be a good colour match for travertine tiles). I sponged off the excess grout and allowed the whole floor to dry overnight.

Travertine Tiled Floor During Renovation East Finchley N2

The following day the tiles were polished with a super fine 3500-grit burnishing pad that really brings up the sheen on polished stone floors. The pad is applied dry with only a little water sprayed onto the floor, a process we refer to as spray burnishing.

The last step was to apply a sealer to the floor in-order to protect it from dirt becoming ingrained in the pores of the stone. We used an impregnating sealer called Colour Grow for this, it soaks into the stone occupying the pores and thereby prevents dirt from residing there. This keeps dirt on the surface where it can be easily cleaned away. This sealer contains a colour enhancing formula which helps to bring out the natural colours in the stone, two coats were applied.

Travertine Tiled Floor During Sealing East Finchley N2

The client was delighted with the transformation before leaving I left them with a bottle of Tile Doctor Stone Soap and some advice on how to best maintain the floor. This will keep the floor in great condition over the coming months and years.

Travertine Tiled Floor After Renovation East Finchley N2


Professional Restoration of a Travertine Tiled Kitchen in East Finchley

Pitted and Dirty Travertine Kitchen Floor Renovated in East Finchley Read More »

Victorian Tiled Hallway Restoration Belsize Park

Communal Victorian Tiled Hallway Restored in Belsize Park NW3

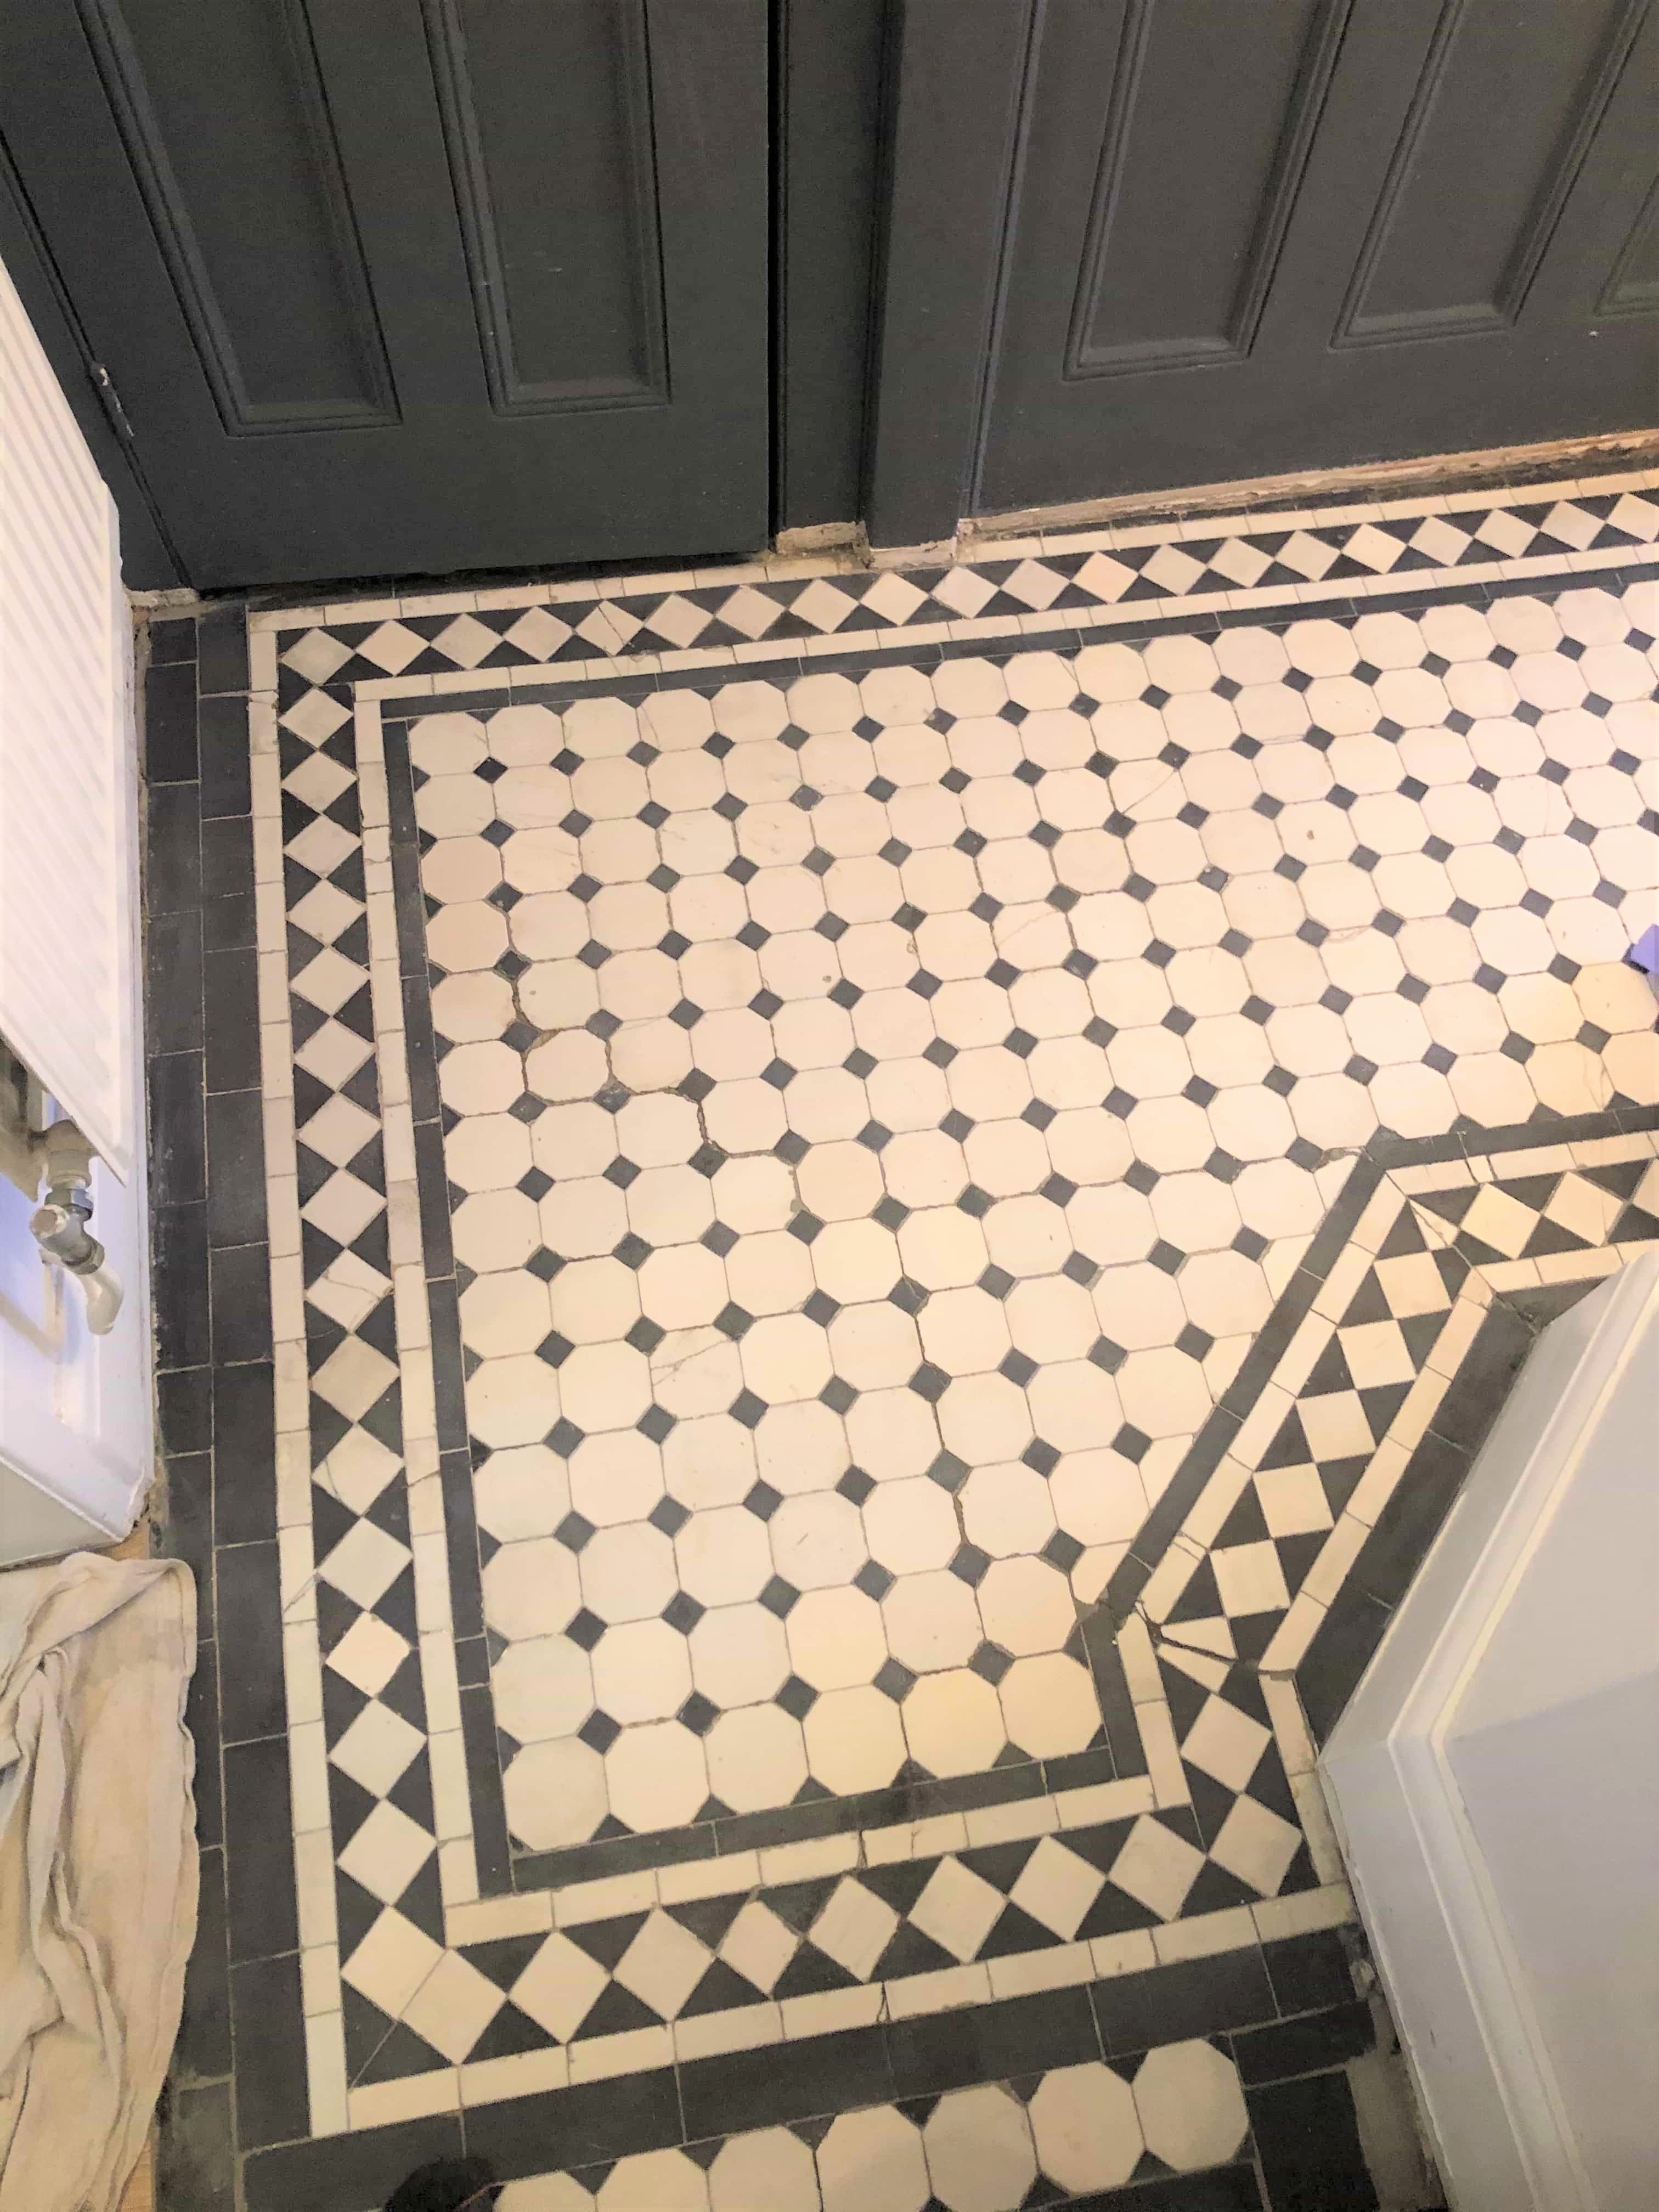
Details below of the recent restoration of a small Victorian Tiled Hallway at a property in Belsize Park NW3. The hallway provided access to several flats and had previously been covered in carpet. The carpet has been secured to the tiles with gripper rod that had been glued to the tiles and there was a section of broken tiles in front of the staircase that had been removed leaving an obvious hole in the floor.

Victorian Tiled Hallway Before Restoration Belsize Park Victorian Tiled Hallway Before Restoration Belsize Park

I carried out a survey of the floor to determine the main issues and took numerous photographs and measurements so I could locate suitable replacements. I knew that locating replacements wouldn’t be difficult as there are a few companies that specialise in this sort of thing and I know several members of the Tile Doctor network who have built up quite a collection. Once I was armed with all the costs, I email over a quote to the managing agent which was accepted and a date scheduled for the work to start.

Repair and Cleaning of a Victorian Tiled Hallway Floor in Belsize Park

Work started by carefully removing the gripper rod and cleaning up the areas where I would need to fit replacement tiles. Tiles were then cut to fit the existing pattern and colours and dry fitted into place making small adjustments along the way until I was satisfied that I had replicated the pattern exactly. Only then were the replacements fixed into place with fresh adhesive. This type of tile restoration work is quite meticulous and the whole of the first day was spent with repairs alone.

I returned on day two to deep clean the whole floor using a strong dilution of Tile Doctor Remove and Go. This product is designed for removing old sealers but is also good at softening adhesives and other contaminates so they can be scrubbed off. I follow the recommended process of spraying the solution onto the surface and then letting it sit for ten minutes so it has time to breakdown the contaminates before being worked in with a 200-grit diamond pad. Once done it was rinsed off with water and the resultant soiling extracted with a wet vacuum.

The next step was to neutralise the floor and counter any efflorescent salts that may have built up in the tiles whilst it was covered in carpet. Old floors like these don’t have the benefit of a damp proof membrane and shouldn’t be covered as it can prevent moisture from rising through the tile and evaporating at the surface. With the carpet gone the floor can breathe again and this can lead to trapped efflorescence salts appearing. We guard against this by giving the floor an acid wash using Tile Doctor Acid Gel and then rinsing off with water and extracting as before.

Sealing a Victorian Tiled Hallway Floor

I left the floor to dry out overnight and returned on day three to apply the sealer which will protect it from dirt becoming ingrained in the tile and improve the appearance.

I used Tile Doctor X-Tra seal for this which is an oil-based sealer that’s full breathable and will allow for moisture to rise through the tiles un-impeded. The oil in the sealer has the added advantage of restoring the colours in the tiles and certainly in this case put the life back in the floor.

Victorian Tiled Hallway After Restoration Belsize Park Victorian Tiled Hallway After Restoration Belsize Park

Once done the original floor which must have been at least 100-years old was completely transformed and the tiled floor added a bit of class to the entrance to the property.


Professional Restoration of a Victorian Tiled Hallway in North London

Communal Victorian Tiled Hallway Restored in Belsize Park NW3 Read More »

Edwardian Hallway Floor Before After Renovation Finchley

Edwardian Tiled Hallway Floor Restored in Finchley

The owners of this Edwardian property in Finchley had purchased it a couple of years prior and since then had slowly been renovating it to restore its original character. The project was almost complete and now attention had turned to the tiled floor. The tiles were in quite a state and I was asked to work our Tile Doctor magic and bring it back to its original condition.

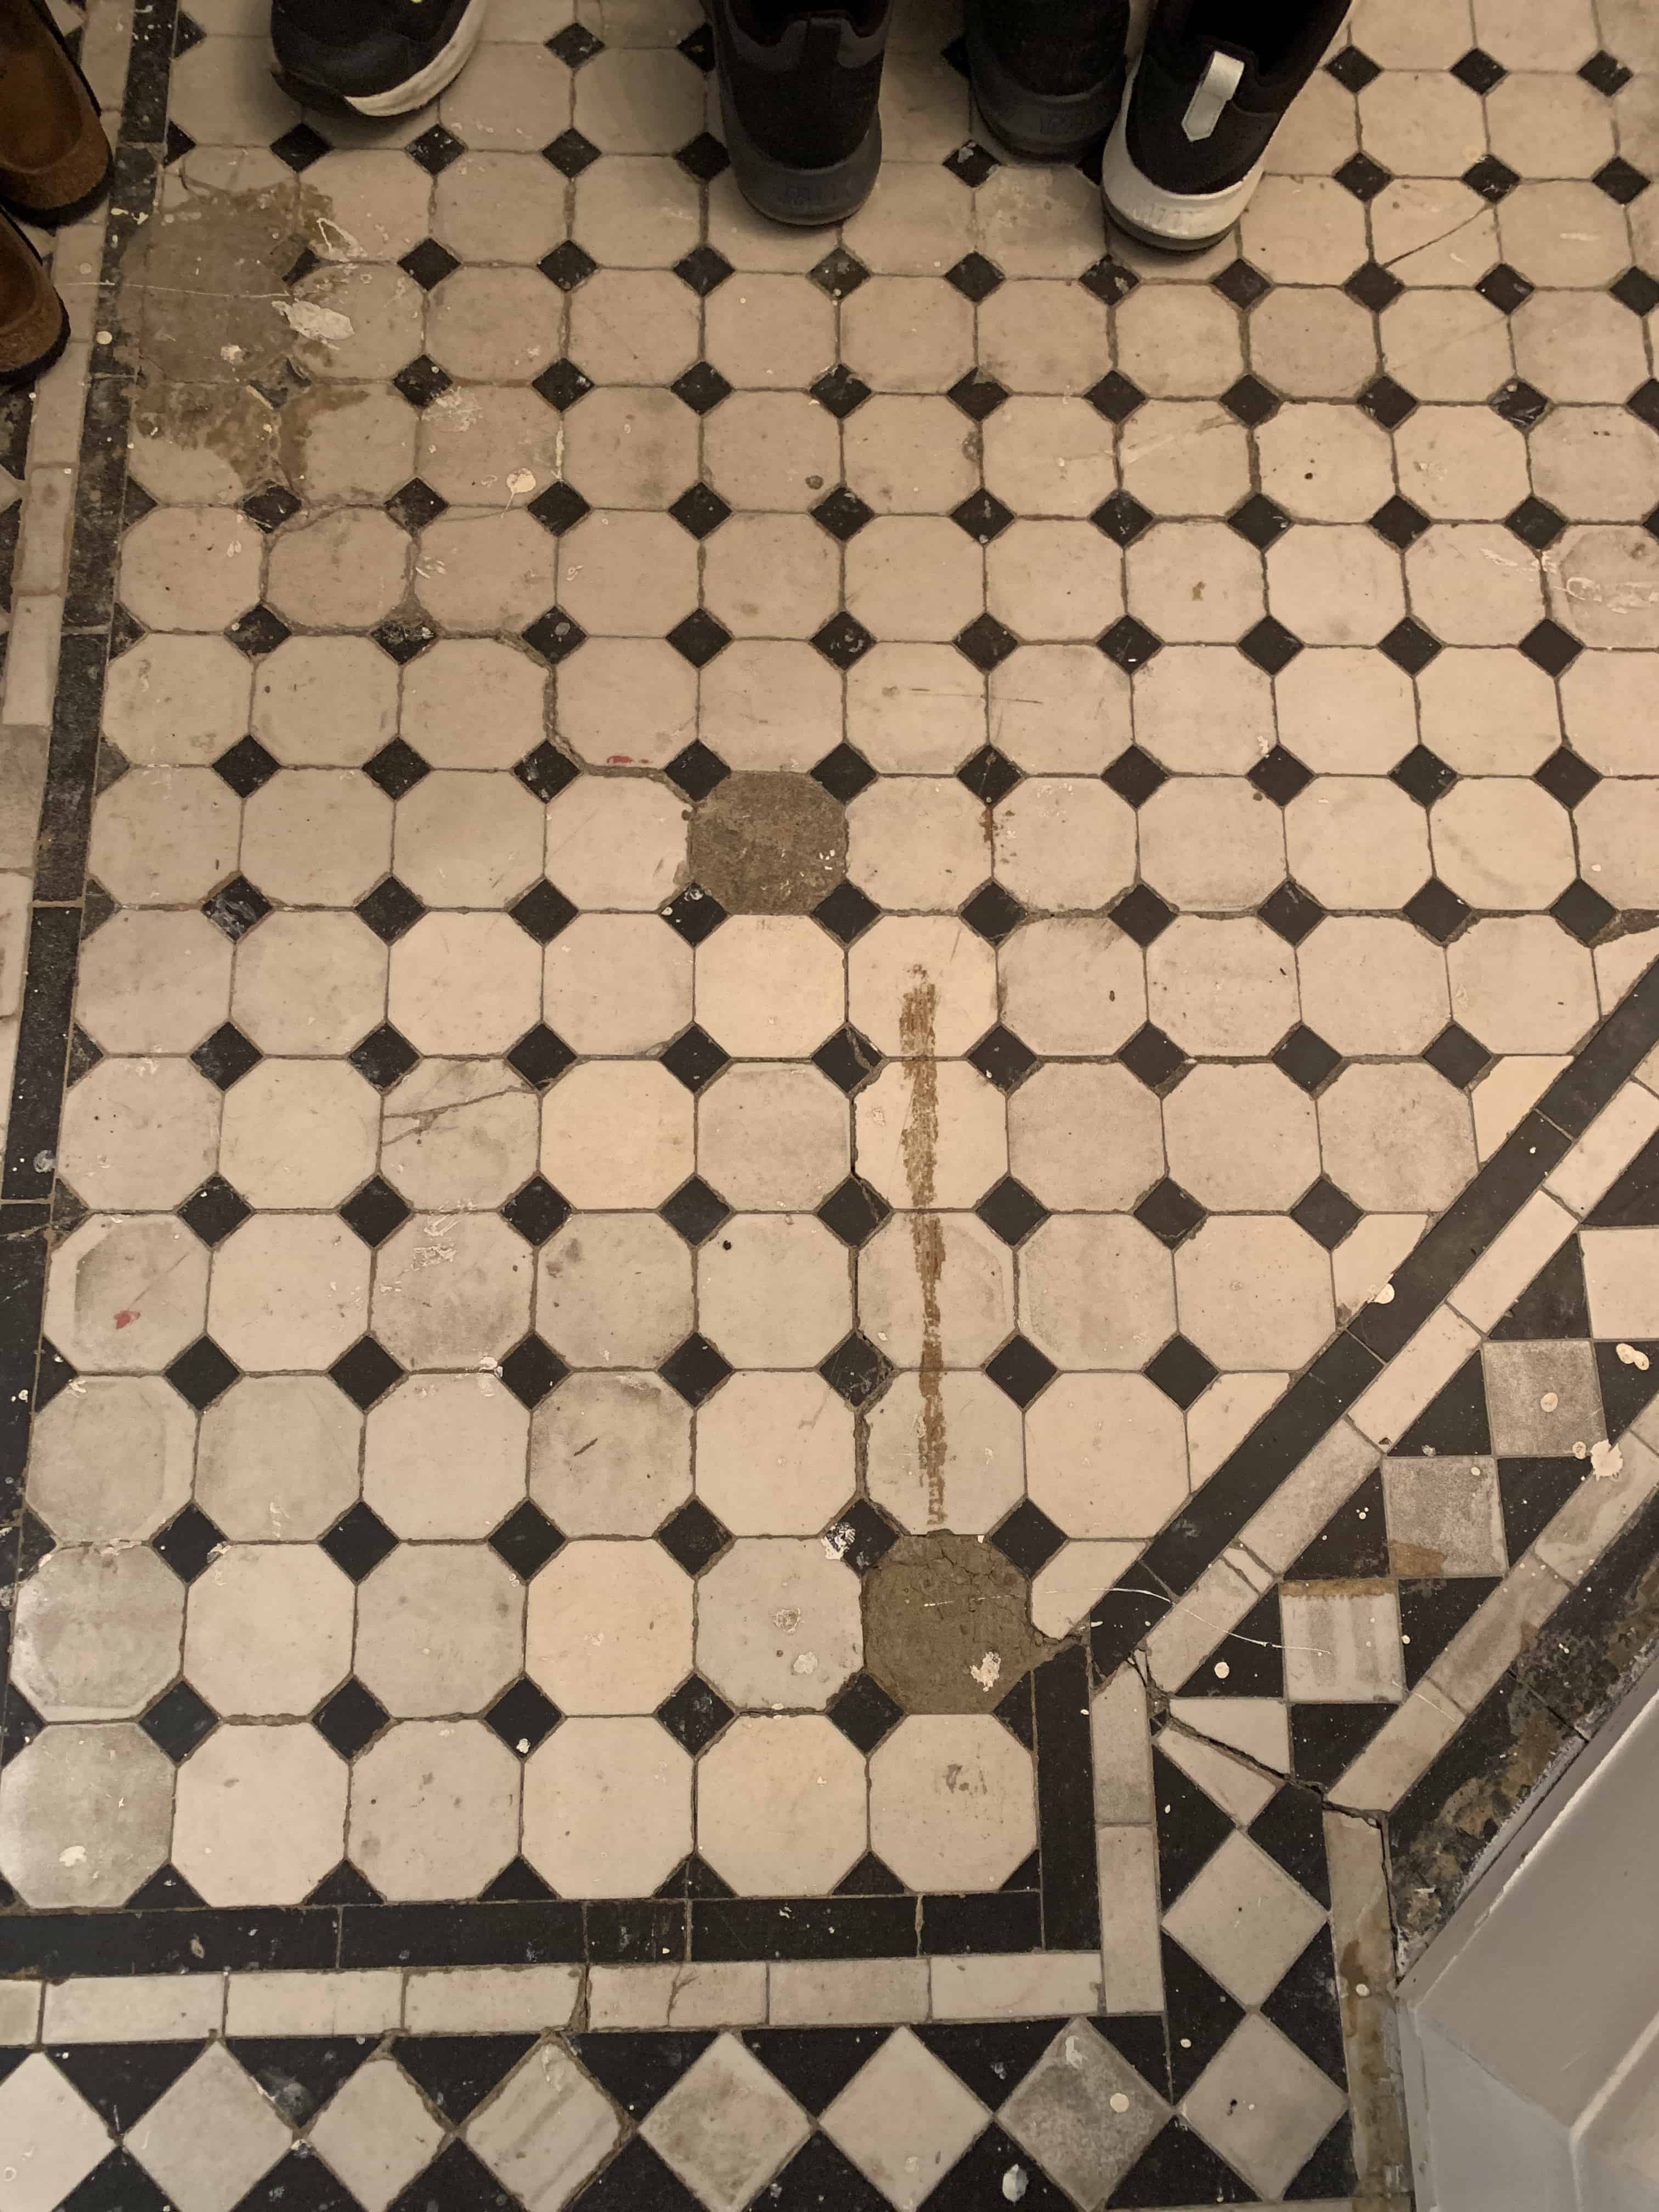
Edwardian Tiled Hallway Floor Before Renovation Finchley

When they moved in the hallway had been covered with carpet which gave the tiles underneath some protection. Unfortunately, however the carpet has been secured with carpet grippers that had been glued to the tiles around the edges. There were also paint splashes on the surface that would need dealing with. On top of that the floor had a few missing tiles that had been back filled by cement to provide a level base for the carpet, the client wanted like them replaced if possible.

Edwardian Tiled Hallway Floor Before Renovation Finchley

After surveying the floor, I explained what could be done and ever completed a small test clean to demonstrate how the tiles would look once deep cleaned. I was confident on being able to source very similar reclaimed tiles so replacing the missing should not be a problem. The client was very happy with the initial test result and my quotation so booked me in to restore the floor.

Cleaning and Repairing an Edwardian Tiled Hallway Floor

On my return I started by applying Tile Doctor Remove and Go to soften up the glue which allowed it to be carefully peeled off the tiles with scrappers. Once all the carpet adhesive was gone, I worked a strong dilution of Tile Doctor Remove and Go into the tiles using a black pad to work the cleaning solution deeper into the tiles. A wet vacuum was used to remove the slurry created, and I followed this by giving the tiles an extra clean using a 200-grit diamond burnishing pad lubricated with water.

The last step in the cleaning process was to give the floor an acid rinse using Tile Doctor Grout Clean-up, I did this for several reasons, first it removes old grout smears from the surface of the tile and second it neutralised any efflorescent salts lying dormant in the floor. This can be quite a problem for old floors which don’t have the benefit of a protective damp proof membrane under the floor. The floor was given a final rinse with water which was again extracted with a wet vacuum.

I then set about lifting all the loose tiles (approximately ten) and carefully removing the concrete infills. I had previously managed to source replacements for these holes from original features. Unfortunately, they didn’t sell the correct sized octagon tiles, so I had bought 150mm square tiles and then needed to cut them on site to get the right size.

After cutting and fixing the tiles I fixed them in place and regrouted the rest of the floor.

Sealing an Edwardian Tiled Hallway Floor

I then left the floor to dry out overnight and returned in the morning. Before applying a sealer, I took several moisture readings with the damp meter to make sure the tiles were dry enough to take the sealer.

I was able to confirm the floor was dry, so went ahead and applied three coats of Tile Doctor Colour Grow sealant. Colour Grow is an impregnating sealer that is fully breathable sealer which is important when it comes to old floors like these that don’t have a damp proof membrane installed.

Edwardian Tiled Hallway Floor After Renovation Finchley

My client was very happy with the renovated floor and for aftercare I left them with a bottle of Tile Doctor Neutral Tile Cleaner and gave advice on how best to clean the floor going forward.

Edwardian Tiled Hallway Floor After Renovation Finchley


Professional Restoration of an Edwardian Tiled Hallway in North London

Edwardian Tiled Hallway Floor Restored in Finchley Read More »

Edwardian Tiled Hallway Before After Deep Restoration Finchley

Restoration of an Edwardian Tiled Hallway in Finchley

After having their hallway carpeted for several years the owner of this Edwardian property in Finchley, North London decided they would like to restore their original tiled hallway floor. They asked me to visit and help lift the carpet to see whether restoring would be feasible. They knew from before that a few areas of tiles were damaged and did not know if replacements could be sourced.

Edwardian Tiled Hallway Before Restoration Finchley

As requested, I went over to have a look at the newly revealed floor and make some recommendations. After carefully removing the hallway carpet we found the floor to be very dirty but importantly intact with only a few sections of loose or missing tiles. It would certainly be possible to restore it and given the length of the hallway I was confident it would look impressive when finished and be a great addition to the property.

We discussed the process and after confirming that sourcing matching reclaimed tiles as replacements was possible, we agreed a price and arranged a date to carry out the work.

Cleaning/Repairing a Edwardian Tiled Hallway Floor

The carpet had left quite a lot of residue on the tiles as well as adhesive from the carpet glue, so our first task was to get the Edwardian tiles clean. We carried out a detailed clean over the whole floor using Tile Doctor Remove & Go to treat the adhesive followed by a strong dilution of Tile Doctor Pro Clean to remove all the dirt and old sealers. The floor was rinsed off afterwards and the soils extracted using a wet vacuum.

The next job was to begin the repairs starting with a complete inspection of the floor to lift the loose, broken and fractured tiles. The good ones were individually cleaned ready for re use. This left about 150-200 broken missing tiles that needed to be replaced. We had a number of reclaimed tiles and a selection of new style Victorian tiles we could cut to fit.

Edwardian Tiled Hallway During Restoration Finchley Edwardian Tiled Hallway During Restoration Finchley

Prior to relaying we prepared the base with new cement and levelled the floor to give a good surface. The tiles were carefully laid to the quick set adhesive, once this was dry the floor was re grouted. Once all the tiles were re-grouted the floor was cleaned of any excess grout with Tile Doctor Grout Clean-Up which is great for removing grout smears.

Edwardian Tiled Hallway During Restoration Finchley

Sealing an Edwardian Tiled Hallway Floor

The floor was then sealed with a coat of Tile Doctor Colour Grow which is a colour enhancing sealer that impregnates the tile and protects it from within. The floor was left to dry overnight, and we returned the next day to apply five coats of Tile Doctor Seal & Go to give a natural satin finish, leaving each coat to dry prior to applying the next.

Edwardian Tiled Hallway After Restoration Finchley

The whole project took three and a half days to complete.

The client was very happy with the result, in fact it was even better than they had expected. For aftercare I recommended that they use Tile Doctor Neutral Tile Cleaner to keep the floor clean as it is pH balanced and will ensure the seal is not undermined which can happen with other household cleaners.

Edwardian Tiled Hallway After Restoration Finchley


Professional Restoration of an Edwardian Tiled Hallway in North London

Restoration of an Edwardian Tiled Hallway in Finchley Read More »

=================================

North London Tile Doctor

================================= Read More »

Scroll to Top