Grout Cleaning

Welcome to my Work History archive where you will find detailed examples of the cleaning and renovation of Grout carried out in North London

Cleaning and Renovating Grout

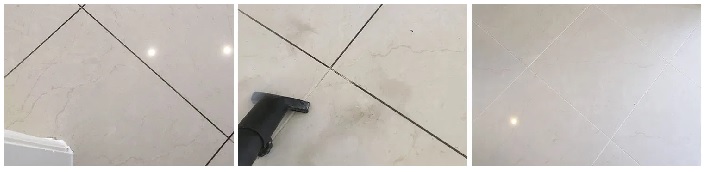
The top layer of grout is porous and can absorb grease, dirt and limescale. Spillages such as wine, lemonades or greasy substances will cause marks and patches in the joints in the floor. Grout between wall-tiles particularly in damp areas like bathrooms will become dirty and unattractive as a result of Mould, Mildew and Limescale.

Mould is one of the most unsightly problems, which usually starts off in the wettest area of the room, this could be the bottom of the shower or bath, then starts to spread and if left unchecked could cover a large area of the wall.

Another common issue we find is a problem known as Grout Haze or Grout Smearing where a thin layer of grout has been left to set on the surface of the tile. Once grout has set it is difficult to remove.

Discolouration of grout joints in bath or shower areas due to continued use of acid formulated shampoos and soaps. This causes yellow orange and pink stains to the grout over even a short period of time. Whilst Grout Joints can be cleaned, badly stained grout may need to be re-coloured.

Protecting your grout in advance with a sealer will prevent most of these issues and although relatively unknown in the UK, protection awareness is growing. Sealing forms an invisible barrier between the grout and the surface, this will then protect your investment for years to come.

We have solutions for all the problems listed above and below you will find detailed examples of work we have carried out in the past to resolve many of these issues. It should give you some idea of what’s involved and what can be achieved with the right techniques and products.


Encaustic Cement Tiled Balcony Renovation West Hampstead NW6

Reviving an Encaustic Cement Tiled Balcony Floor in West Hampstead NW6

This impressive Encaustic Cement tiled balcony was on the top floor of an apartment in West Hampstead NW6. The tiles had been laid relatively recently and unfortunately were now badly stained from plant pots which had left dark patches and mould.

Unhappy with the way the floor had been finished we were asked to deep clean the tiles and then seal them to protect them from future staining. I visited the property to conduct a survey and could see why they were keen on having it renovated. Despite the problems it was a lovely tiling job featuring an intricate decorative pattern of Victorian-style encaustic and geometric floor tiles, centred around an ornate, panel framed with patterned borders.

Encaustic Cement Tiled Balcony Before Cleaning Sealing in West Hampstead NW6

Confident of being able to restore the floors appearance I worked out a detail quote for the work and agreed an initial date for the work to start. Being external that date would need to change if the weather was bad.

Deep Cleaning a Encaustic Cement Tiled Balcony Floor

To remove the staining the work started with an application of Tile Doctor Oxy-Gel scrubbed in with a Black Pad fitted to a rotary machine. Using a Gel cleaner minimises the amount of water used on the floor which should reduce the drying time. Once complete the slurry was then rinsed and then vacuumed away with an industrial vacuum.

Encaustic Cement Tiled Balcony Before Cleaning in West Hampstead NW6

The cleaning process worked well and removed the worst of the algae and dirt caused by fallen leaves and watering of plant pots from the tile and grout.

To improve the appearance of the Encaustic Cement tiles further they were then burnished with a set of Tile Doctor Burnishing pads of different grits. This started with a coarse 400-grit applied with water followed by 800 and 1500-grit pads. The floor is rinsed and extracted to remove the fine slurry generated after each pad and then finished with a very fine 3500-grit polishing pad which is applied dry with only a splash of water.

The first wo pads helped to remove dirt that chemicals alone could not remove and then the finer grits helped to create surface tension mechanically closing the pores prior
To application of the sealer.

Sealing an Encaustic Cement Tiled Balcony Floor

With the use of a fan and a little help from the sun I was able to fully dry the tiles so they would be ready for sealing later that afternoon. I waited for the sun to move around the house before sealing with Tile Doctor X-Tra Seal which is an impregnating sealer rated for external use and ideal for this situation. Two coats of X-Tra Seal were applied to provide a durable finish.

Unfortunately, there was nowhere to store the plant pots so it was necessary to do the sealing in two halves’ carefully cleaning and replacing the pots as I went. This is not ideal but it was the only practical solution based on the layout of the flat.

Encaustic Cement Tiled Balcony After Cleaning Sealing in West Hampstead NW6

Before leaving we discussed aftercare and I provided the customer with a bottle of Neutral Tile Cleaner which being ph neutral won’t affect the sealer. I also provided some advice regarding the use of trays and stands for plant pots which prevents a wet muddy pot sitting directly on the tile reducing staining.

The result was transformational and both the customer and I were very pleased with the way it turned out.


Professional Renovation of a Modern Encaustic Cement Tiled Balcony in North London

Reviving an Encaustic Cement Tiled Balcony Floor in West Hampstead NW6 Read More »
150 Year Old Slate Basement Floor Restoration Islington

150-Year-Old Slate Basement Floor Restored in Islington N1

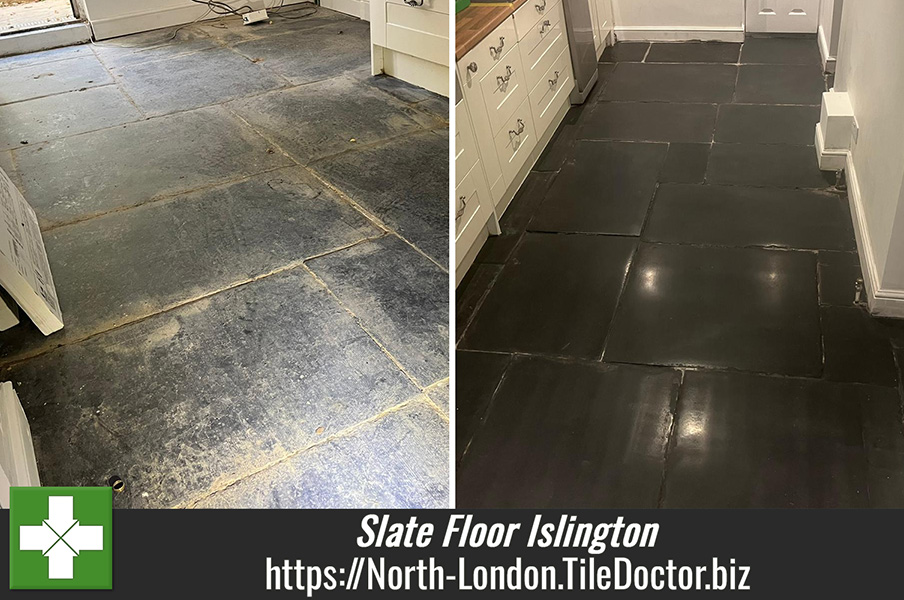
Detailed below is the restoration of a Slate Floor in a basement flat in the Barnsbury area of Islington. The customer had bought it as an investment and was in the process of renovating it when they discovered the original slate floor which is approximately 150 years old. Unfortunately, its age was showing and unsure about how to get the best out of the floor they contacted Tile Doctor for help.

150 Year Old Slate Basement Floor Before Restoration Islington

Willing to help with their project I paid a visit to the property to survey the floor and work out a way forward. I discovered that the floor had been covered in black paint which was now peeling away revealing the Slate underneath which was dull and worn.

150 Year Old Slate Basement Floor Before Restoration Islington

I did a test clean to understand the best way to restore the Slate and from that I was able to work out a detailed quotation for restoring the floor. The quote was accepted and a date set for the work to start.

Cleaning a Slate Tiled Kitchen

The first job was to remove the remaining paint from the Slate so the stone could be deep cleaned. To do this the tiles were sprayed with a strong dilution of Tile Doctor Remove and Go which was left to soak in for ten minutes before being scrubbed in with a black buffing pad fitted to a rotary machine. A steamer was also used on some of the stubborn areas to make sure all the paint was gone and afterwards all the soiling removed used a wet vacuum.

The next step was to renovate the surface of the Slate using a coarse 400-grit burnishing pad. These pads are made from fine industrial diamonds and are run over each Slate tile several times to ensure an even coverage. The floor is then rinsed with water and the soiling extracted with the wet vacuum. Once done the pad was replaced with a finer 800-grit burnishing pad to further refine the surface.

After a further rinse and extraction, the grout was scrubbed by hand using Tile Doctor Pro-Clean and a stiff scrubbing brush. After another rinse and extraction, the floor was clean and free of dirt and old paint. Despite being a small area, the cleaning took two days to complete. Although clean the Slate was now looking dull and washed out however that didn’t concern me as I knew it would look fantastic once sealed.

150 Year Old Slate Basement Floor During Restoration Islington

Sealing a Slate Tiled Kitchen

The floor was left over the weekend to dry; I reasoned that the thick Slate stones down in the basement were laid well before the invention of Damp Proof Membranes and would therefore need extra time.

Work resumed on the Monday and started by checking the moisture level of the Slate with a damp meter. The readings confirmed the floor was dry and confirmed the extra time had done the job. To seal the floor which will protect it from ingrained dirt and enhance the finish Tile Doctor Stone Oil was applied. This is an oil-based sealer that improves the texture and dark colours in the stone.

150 Year Old Slate Basement Floor After Restoration Islington

The sealer is applied using a microfibre cloth and any excess product is wiped off before buffing with a white buffing pad on the rotary machine. This left a nice sheen to the tile and a consistent look throughout.

150 Year Old Slate Basement Floor After Restoration Islington

Our client was very happy with the finish, the Slate and Grout had been transformed and the sealer had really enhanced the look of the slate. For aftercare we recommended using Tile Doctor Neutral Cleaner which will provide effective cleaning whilst not impacting the seal.

Professional Restoration of a Slate Tiled Basement Floor in North London

150-Year-Old Slate Basement Floor Restored in Islington N1 Read More »

Pitted Travertine Tiled Kitchen Floor Renovation East Finchley N2

Pitted and Dirty Travertine Kitchen Floor Renovated in East Finchley

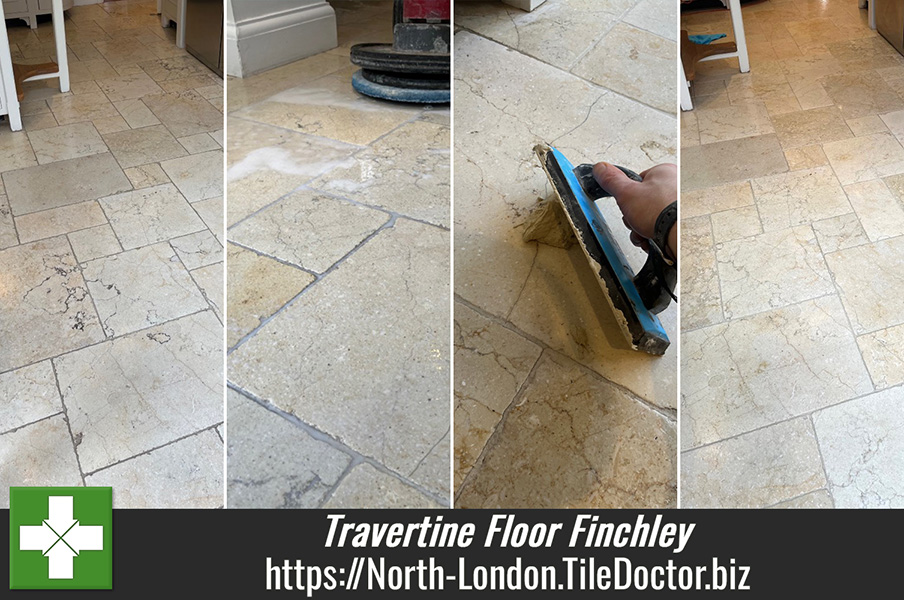
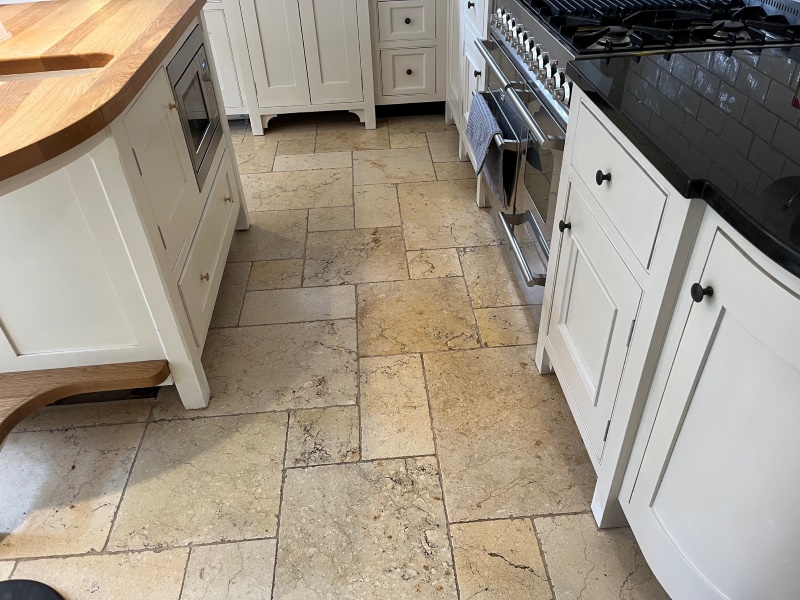
Here we have a travertine floor that was installed in the kitchen of a property in East Finchley around 17 years prior. Over the years some of the grout had become loose and the sealer had worn off allowing dirt to get into the pits of the tiles. The stone and grout were now getting very dirty, and the client was struggling to keep it clean. The floor now needed renovation and I was asked to recommend a solution.

Travertine Tiled Floor Before Renovation East Finchley N2

I visited the property to survey the floor, assess the issues and come up with a plan for its renovation using a set of diamond burnishing pads. From the plan I was able to email a detailed quotation over to the client which was accepted and a date agreed for the work to being.

Cleaning and Repairing a Travertine Tiled Kitchen

On the first day work started with the application of a 400-grit burnishing pad which was worked into the travertine using a floor buffer and water for lubrication. The floor was then rinsed and the slurry extracted with a wet vacuum. This process was then repeated with an 800 and then 1500 grit pad again extracting the soiling with a wet vacuum after each pad.

Travertine Tiled Floor During Renovation East Finchley N2

After working through the pads, the grout was then cleaned using Tile Doctor Pro-Clean scrubbed in with a handheld brush. I find this is the best method to get the dirt out of the grout, I also used it to get into the recessed of the pitted stone to ensure the floor was as clean as it could be.

Travertine Tiled Floor During Cleaning East Finchley N2

Once happy the floor was rinsed with water and extracted several times to remove any trace of Tile Doctor Pro-Clean and loose dirt.

Sealing a Travertine Tiled Kitchen

Once the Travertine was dry, I set about refilling the loose grout and pitting in the tiles with jasmine grout (a colour that tends to be a good colour match for travertine tiles). I sponged off the excess grout and allowed the whole floor to dry overnight.

Travertine Tiled Floor During Renovation East Finchley N2

The following day the tiles were polished with a super fine 3500-grit burnishing pad that really brings up the sheen on polished stone floors. The pad is applied dry with only a little water sprayed onto the floor, a process we refer to as spray burnishing.

The last step was to apply a sealer to the floor in-order to protect it from dirt becoming ingrained in the pores of the stone. We used an impregnating sealer called Colour Grow for this, it soaks into the stone occupying the pores and thereby prevents dirt from residing there. This keeps dirt on the surface where it can be easily cleaned away. This sealer contains a colour enhancing formula which helps to bring out the natural colours in the stone, two coats were applied.

Travertine Tiled Floor During Sealing East Finchley N2

The client was delighted with the transformation before leaving I left them with a bottle of Tile Doctor Stone Soap and some advice on how to best maintain the floor. This will keep the floor in great condition over the coming months and years.

Travertine Tiled Floor After Renovation East Finchley N2


Professional Restoration of a Travertine Tiled Kitchen in East Finchley

Pitted and Dirty Travertine Kitchen Floor Renovated in East Finchley Read More »

Limestone Floor Before After Renovation Highgate

Grubby Honed Limestone Floor restored in Highgate

This client from Highgate in North London, N6 contacted us about their large honed Limestone tiled floor that was installed throughout the ground floor. It had been laid seven years prior and was now grubby and in need of a deep clean and seal including the grout which had turned black with dirt.

I visited the property to survey and assess what was required and provided the owner with a quotation for the renovation. The hallway pictured was in the worst condition, it was a busy house with young children and dogs and over the years the sealer had worn down leaving it vulnerable to ingrained dirt. Without a sealer to protect the stone it had become heavily soiled and lost its original polished appearance.

Honed Limestone Floor Before Cleaning Highgate

Happy with the quote we scheduled a date for the work to go ahead. The quote included deep cleaning and burnishing the stone to bring back the polish, grout cleaning and re-sealing the Limestone to protect it.

Cleaning a Honed Limestone Tiled Floor

We arrived on the first day and prepared the area by taping up the skirting and woodwork to protect them from potential splashing. Next step was to burnish the floor using a set of Tile Doctor Diamond Burnishing Pads, specifically the 400, 800 and 1500 grit pads fitted to a rotary machine, these were used in sequence running each pad over the tiles several times with water to lubricate the process. The water turns into a fine slurry as pores in the stone are opened and the dirt is released, the slurry is rinsed off with more water and extracted using an industrial wet vacuum after each pad. The finer 800 and 1500-grit pads slowly close the pores and refine the appearance of the stone building up the polish in the process.

A strong dilution of Tile Doctor Pro-Clean was then applied to the grout lines, leaving it for a short while to soak in and then hand scrubbing with a grout brush. The dirty cleaning solution and were then removed from the floor with the wet vacuum.

This process was repeated across the different sections of the Limestone floor until I was satisfied with its appearance. Before leaving for the day, I rinsed the floor again using a buffing machine fitted with a brush fitted to give it a final clean. The floor was dried as much as possible using the wet vacuum and then allowed it to dry off fully overnight.

Sealing a Honed Limestone Tiled Ground Floor

The following day the final 3000-grit pad in the four-pad set was applied to the floor to bring up the polish even further. The pad is applied dry with only a little water sprayed onto the tile. We call this process a “Spray Burnish” and as well as leaving the floor nice and dry ready for sealing it adds a nice subtle shine to the stone.

The floor was then sealed with two coats of Tile Doctor Colour Grow sealer. This is a colour intensifying impregnating sealer that works by occupying the pores in the stone so dirt cannot become ingrained there. It will provide durable protection and make the floor much easier to keep clean. It worked well on the pale Limestone and beautifully enhanced the colour and features in stone. Once complete the floor looked brand new again.

Honed Limestone Floor After Renovation Highgate

I left a complimentary bottle of Tile Doctor Stone Soap with the client and gave them some information about how best to maintain the floor. This product is pH neutral and cleans whilst maintaining the patina on the stone helping to keep the floor in great condition.

The client was delighted with the result and left us a great review.

“Andrew is excellent and gets on with the job and we got a fantastic result. Highly recommend. By Aaron S, Highgate, 15 March 2021”


Professional Restoration of a Honed Limestone Tiled Ground Floor in North London

Grubby Honed Limestone Floor restored in Highgate Read More »

=================================

North London Tile Doctor

================================= Read More »

Scroll to Top