Colour Grow

Pitted Travertine Tiled Kitchen Floor Renovation East Finchley N2

Pitted and Dirty Travertine Kitchen Floor Renovated in East Finchley

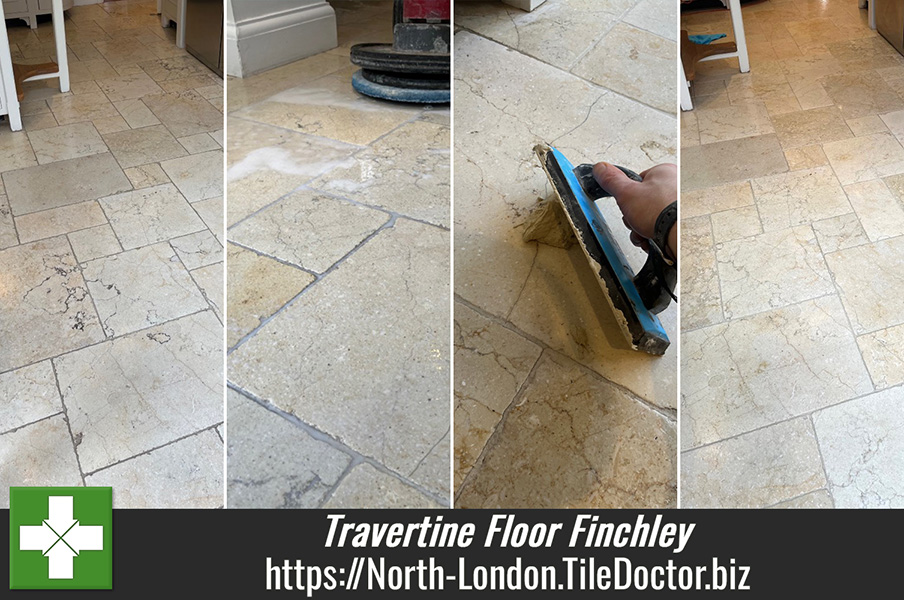
Here we have a travertine floor that was installed in the kitchen of a property in East Finchley around 17 years prior. Over the years some of the grout had become loose and the sealer had worn off allowing dirt to get into the pits of the tiles. The stone and grout were now getting very dirty, and the client was struggling to keep it clean. The floor now needed renovation and I was asked to recommend a solution.
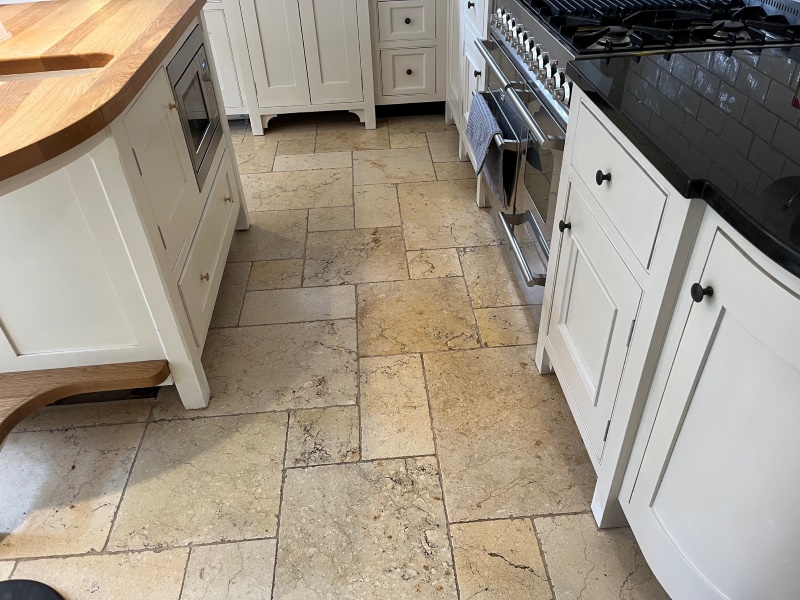
Travertine Tiled Floor Before Renovation East Finchley N2

I visited the property to survey the floor, assess the issues and come up with a plan for its renovation using a set of diamond burnishing pads. From the plan I was able to email a detailed quotation over to the client which was accepted and a date agreed for the work to being.

Cleaning and Repairing a Travertine Tiled Kitchen

On the first day work started with the application of a 400-grit burnishing pad which was worked into the travertine using a floor buffer and water for lubrication. The floor was then rinsed and the slurry extracted with a wet vacuum. This process was then repeated with an 800 and then 1500 grit pad again extracting the soiling with a wet vacuum after each pad.

Travertine Tiled Floor During Renovation East Finchley N2

After working through the pads, the grout was then cleaned using Tile Doctor Pro-Clean scrubbed in with a handheld brush. I find this is the best method to get the dirt out of the grout, I also used it to get into the recessed of the pitted stone to ensure the floor was as clean as it could be.

Travertine Tiled Floor During Cleaning East Finchley N2

Once happy the floor was rinsed with water and extracted several times to remove any trace of Tile Doctor Pro-Clean and loose dirt.

Sealing a Travertine Tiled Kitchen

Once the Travertine was dry, I set about refilling the loose grout and pitting in the tiles with jasmine grout (a colour that tends to be a good colour match for travertine tiles). I sponged off the excess grout and allowed the whole floor to dry overnight.

Travertine Tiled Floor During Renovation East Finchley N2

The following day the tiles were polished with a super fine 3500-grit burnishing pad that really brings up the sheen on polished stone floors. The pad is applied dry with only a little water sprayed onto the floor, a process we refer to as spray burnishing.

The last step was to apply a sealer to the floor in-order to protect it from dirt becoming ingrained in the pores of the stone. We used an impregnating sealer called Colour Grow for this, it soaks into the stone occupying the pores and thereby prevents dirt from residing there. This keeps dirt on the surface where it can be easily cleaned away. This sealer contains a colour enhancing formula which helps to bring out the natural colours in the stone, two coats were applied.

Travertine Tiled Floor During Sealing East Finchley N2

The client was delighted with the transformation before leaving I left them with a bottle of Tile Doctor Stone Soap and some advice on how to best maintain the floor. This will keep the floor in great condition over the coming months and years.

Travertine Tiled Floor After Renovation East Finchley N2


Professional Restoration of a Travertine Tiled Kitchen in East Finchley

Pitted and Dirty Travertine Kitchen Floor Renovated in East Finchley Read More »

Victorian Tiled Hallway Floor Rescued Kensal Rise

Damaged Original Classic Victorian Tiled Hallway Rescued in Kensal Rise

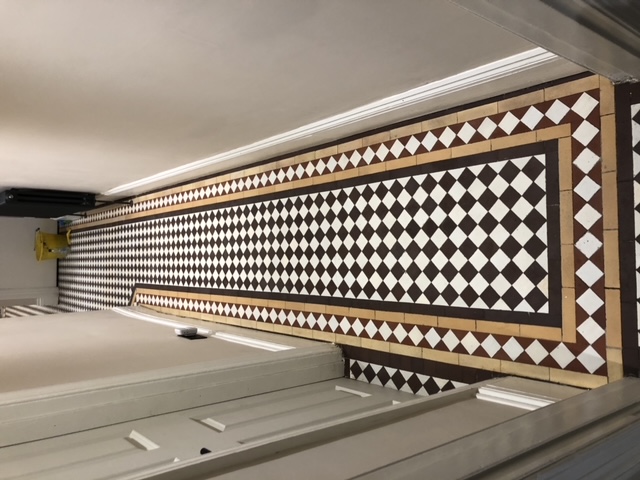
This classic original Black and White Victorian tiled floor was discovered by a customer in Kensal Rise under a lino floor when they moved in. Unfortunately, a large section of tiling was missing and had been backfilled with cement after a radiator pipe had been installed at some point in the past. The new owner understood that value that period features such as Victorian floors can add to the value of a property and was keen to have it restored.

Damaged Classic Victorian Tiled Hallway Before Restoration Kensal Rise Damaged Classic Victorian Tiled Hallway Before Restoration Kensal Rise

We have done numerous similar restorations in the past, so we were asked to go over, survey the floor and quote for carrying out the work. Knowing that a lot of the cement would need to be removed I started by carefully chipping away some of the cement to make sure the radiator pipe had been buried deep enough for tiling. It was so after measuring up and inspecting the rest of the floor I went ahead and issued a quote.

The client accepted so we booked in a mutually convenient date to carry out the works. The property was in a lovely street of similar properties many of which looked as if they had been restored.

Cleaning and Repairing a Victorian Tiled Hallway Floor

The first task we did was clean the existing tiles with an application of Tile Doctor Remove and Go which is a strong alkaline coatings remover. This was diluted with water, sprayed onto the tiles, left to soak in for ten minutes and then scrubbed into the floor using a black pad fitted to a rotary machine. After rinsing off and the slurry and extracting with a wet vacuum the tiles were inspected and the process repeated where needed.

Damaged Classic Victorian Tiled Hallway During Restoration Kensal Rise

The next stage was to treat the floor to an acid rinse using Tile Doctor Acid Gel, this time worked in with a coarse 200-grit pad. Old floors like this one don’t have a damp proof membrane under the floor and as the moisture rises though the tile to evaporate at the surface you can find white salt deposits being left behind. Giving the floor an acid rinse like this will dissolve the salts and will also neutralise the floor after the use of an alkaline cleaner. Combine this with a coarse pad and you find the tiles come up really well, it will even remove old grout smears on the surface of the tiles. Once done the floor was rinsed again and the floor dried as much as possible using the wet vacuum.

After leaving the floor to dry off overnight we came back the next day and started the processing of excavating the cement around the heating pipe. With the rubble removed fast drying self-levelling cement was applied to a point where it was the right height for re-tiling.

On day three with the cement now dry it was tiled using matching tiles I had managed to source from Original Style Tiles who are a supplier that specialises in reproduction Victorian tiles. They have a vast range so we can usually find a very close match. The tiles were laid in a matching diamond pattern and grouted in later that afternoon.

Damaged Classic Victorian Tiled Hallway During Restoration Kensal Rise

Sealing a Victorian Tiled Hallway Floor

On the fourth and final day, we returned to seal the entire floor with a couple of coats of Tile Doctor Colour Grow which is a matt sealer that soaks into the tile occupying the pores and thereby preventing dirt from becoming ingrained there. It also contains a colour enhancer that really brings out the contrast in the black and white tiles. It is also fully breathable so is perfect for floors of this age which lack the damp proof membrane beneath the floor that we now use in every modern build.

Damaged Classic Victorian Tiled Hallway After Restoration Kensal Rise Damaged Classic Victorian Tiled Hallway After Restoration Kensal Rise

The client was very happy with the finished result, the entrance hall was now in keeping with the rest of the period features of the property. For aftercare cleaning I recommended the use of Tile Doctor Neutral Tile Cleaner which is a gentle pH neutral tile cleaning product compatible for use on sealed tiles. Many household cleaning products tend to be very strong and can affect the sealer protecting the floor.

Damaged Classic Victorian Tiled Hallway After Restoration Kensal Rise


Professional Restoration of a Victorian Tiled Hallway in North London

Damaged Original Classic Victorian Tiled Hallway Rescued in Kensal Rise Read More »

Victorian Hallway Floor Restoration Bounds Green

Clean, Repair and Seal of a Damaged Victorian Hallway Floor in Bounds Green

My client discovered found this Victorian tiled floor under the carpet of a communal hallway in a large Victorian house in Bounds Green. The property had previously been converted into three flats and it seems the developers of the property dodged the cost of having the floor renovated and opted to glue down a carpet instead. The floor was in quite a state and there was a section of tiles missing where a pipe had been laid under the floor.

Victorian Tiled Floor Before Restoration Bounds Green

I visited the property to survey the floor and prepare a quote for renovating the floor. With the floor in such a state I could see I would need to source replacement tiles. Whilst there I also carried out a small test clean to understand what it would take to ensure a good result could be achieved. Impressed with results from the test clean and happy with the quote my client agreed to have us back to do the work.

Cleaning and Repairing a Victorian Tiled Hallway Floor

Day one started by deep cleaning the floor using a strong dilution of Tile Doctor Remove and Go which was scrubbed in with a black pad fitted to a rotary machine. This product weakens the glue and allows it to be removed with handheld scrapers, a steamer also comes in handy during this process.

Next step was to tackle the thin layer of cement screed which had been applied in some areas to level the floor ready for carpet. To do this a 200-grit diamond pad was fitted to the rotary floor buffer and run over the tiles along with Tile Doctor Acid Gel both to lubricate and help clean away the cement residues. This process generates a lot of soil with is rinsed off with water and extracted using a wet vacuum.

The 200-grit pad was followed up with a finer 400-grit pad to improve the condition of the tile, again using Acid Gel. After another round of rinsing and extracting the cleaning process was complete. As well as removing the cement the Acid Gel will neutralise any potential efflorescent salt issues that are a common problem with floors of this age. The floor was then rinsed with water and the soiling removed with a wet vacuum.

The next step was to tackle the damaged section of tiling where the pipe had been laid. To do this the backfilled cement was carefully chiselled out and the rubble removed. The subfloor was then rebuilt to with fast drying cement ready for tiling the next day.

For this project we were unable find existing replacement tiles that fitted exactly so instead large square tiles in the colours required were obtained from Original Features (just down the road in Crouch End N8) and then cut down to size on site.

Victorian Tiled Floor During Restoration Bounds Green Victorian Tiled Floor During Restoration Bounds Green

After cutting all the tiles to match the existing pattern I laid them into the floor using a fast-drying flexible adhesive. The floor set over lunch and were grouted later that afternoon.

Sealing a Victorian Tiled Hallway Floor

The following day I returned and sealed the tiles with three coats of Tile Doctor Colour Grow which is a breathable impregnating sealer that will soak into the tile adding protection. This takes a while to apply as you have to wait at least half an hour between coats to dry before applying the next.

Additionally, Colour Grow is a colour enhancing sealer and so was a perfect choice for this colourful floor. Being breathable it will also cope well with any moisture rising through the floor which is important for old floors like this which don’t have a damp proof membrane installed.

Victorian Tiled Floor After Restoration Bounds Green

My client was very happy with the newly restored Victorian tiled hallway which looked so much better than the previous carpet and had added so much more value to the property. For aftercare I recommended the use of Tile Doctor Neutral Tile Cleaner, which is pH balanced cleaner that will clean the tiles without being so strong that it impacts the sealer.


Professional Restoration of a Victorian Tiled Hallway in North London

Clean, Repair and Seal of a Damaged Victorian Hallway Floor in Bounds Green Read More »

Scroll to Top