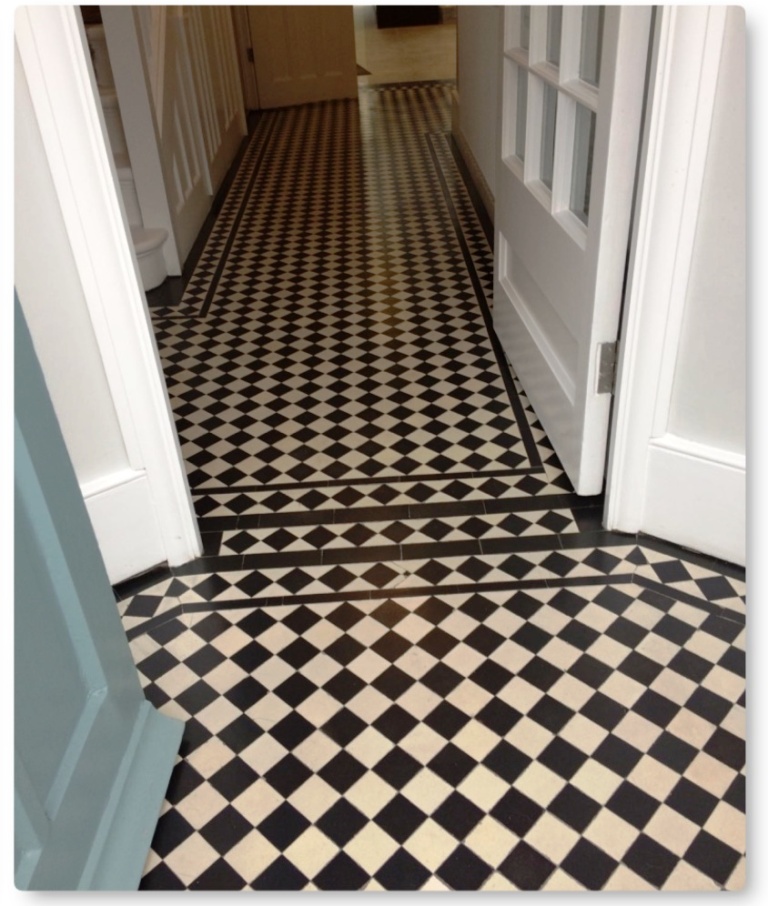
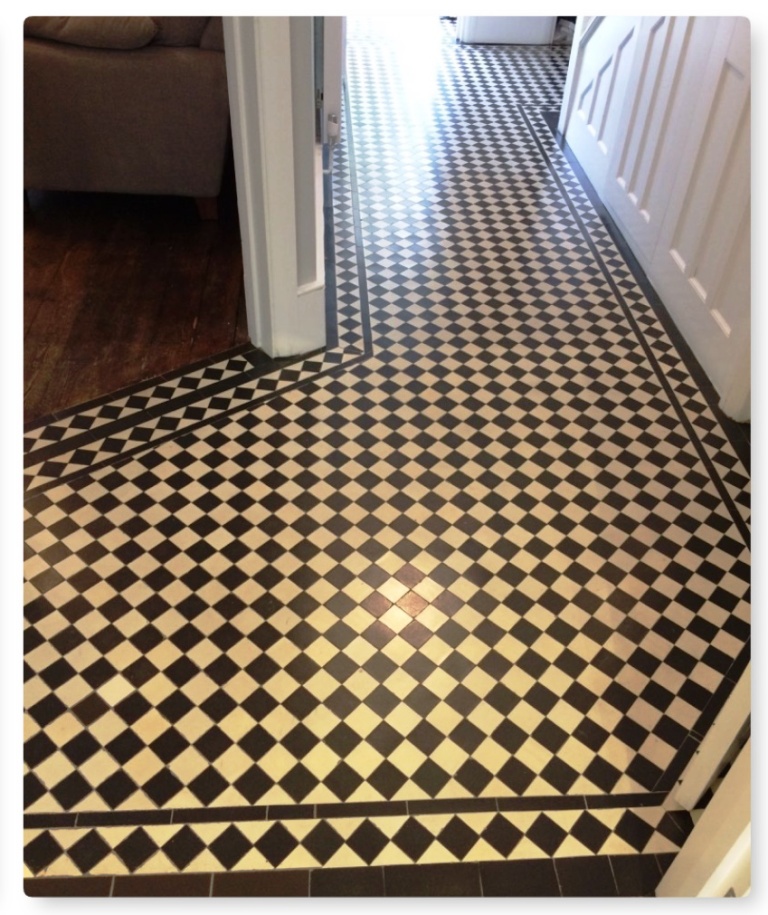
Restoration

Limestone Floor Before After Renovation Highgate

Grubby Honed Limestone Floor restored in Highgate

This client from Highgate in North London, N6 contacted us about their large honed Limestone tiled floor that was installed throughout the ground floor. It had been laid seven years prior and was now grubby and in need of a deep clean and seal including the grout which had turned black with dirt.

I visited the property to survey and assess what was required and provided the owner with a quotation for the renovation. The hallway pictured was in the worst condition, it was a busy house with young children and dogs and over the years the sealer had worn down leaving it vulnerable to ingrained dirt. Without a sealer to protect the stone it had become heavily soiled and lost its original polished appearance.

Honed Limestone Floor Before Cleaning Highgate

Happy with the quote we scheduled a date for the work to go ahead. The quote included deep cleaning and burnishing the stone to bring back the polish, grout cleaning and re-sealing the Limestone to protect it.

Cleaning a Honed Limestone Tiled Floor

We arrived on the first day and prepared the area by taping up the skirting and woodwork to protect them from potential splashing. Next step was to burnish the floor using a set of Tile Doctor Diamond Burnishing Pads, specifically the 400, 800 and 1500 grit pads fitted to a rotary machine, these were used in sequence running each pad over the tiles several times with water to lubricate the process. The water turns into a fine slurry as pores in the stone are opened and the dirt is released, the slurry is rinsed off with more water and extracted using an industrial wet vacuum after each pad. The finer 800 and 1500-grit pads slowly close the pores and refine the appearance of the stone building up the polish in the process.

A strong dilution of Tile Doctor Pro-Clean was then applied to the grout lines, leaving it for a short while to soak in and then hand scrubbing with a grout brush. The dirty cleaning solution and were then removed from the floor with the wet vacuum.

This process was repeated across the different sections of the Limestone floor until I was satisfied with its appearance. Before leaving for the day, I rinsed the floor again using a buffing machine fitted with a brush fitted to give it a final clean. The floor was dried as much as possible using the wet vacuum and then allowed it to dry off fully overnight.

Sealing a Honed Limestone Tiled Ground Floor

The following day the final 3000-grit pad in the four-pad set was applied to the floor to bring up the polish even further. The pad is applied dry with only a little water sprayed onto the tile. We call this process a “Spray Burnish” and as well as leaving the floor nice and dry ready for sealing it adds a nice subtle shine to the stone.

The floor was then sealed with two coats of Tile Doctor Colour Grow sealer. This is a colour intensifying impregnating sealer that works by occupying the pores in the stone so dirt cannot become ingrained there. It will provide durable protection and make the floor much easier to keep clean. It worked well on the pale Limestone and beautifully enhanced the colour and features in stone. Once complete the floor looked brand new again.

Honed Limestone Floor After Renovation Highgate

I left a complimentary bottle of Tile Doctor Stone Soap with the client and gave them some information about how best to maintain the floor. This product is pH neutral and cleans whilst maintaining the patina on the stone helping to keep the floor in great condition.

The client was delighted with the result and left us a great review.

“Andrew is excellent and gets on with the job and we got a fantastic result. Highly recommend. By Aaron S, Highgate, 15 March 2021”


Professional Restoration of a Honed Limestone Tiled Ground Floor in North London

Grubby Honed Limestone Floor restored in Highgate Read More »

Edwardian Hallway Restoration Before and After Sealing Muswell Hill

Edwardian Tiled Hallway Floor Restored in Muswell Hill, London

It must seem to he reader of this site that the only we get in North London relates to Victorian and Edwardian tiled floors. They are certainly popular, and we do get our fair share, but I can assure we also work on all types of tile, stone and grout however at the moment there appears to be a huge demand for our services in restoring Victorian and Edwardian tiled floors.

This post which comes from a property in the London suburb of Muswell Hill which is well known for Victorian and Edwardian houses. The owners had decided to improve the look of their hallway and uncovered an original Edwardian tiled floor after pulling up the carpet. Realising it was an original feature of their period property they decided to get it cleaned, repaired and restored back to its rightful splendour.

Edwardian Hallway Before Restoration Muswell Hill Edwardian Hallway Before Restoration Muswell Hill

Deep Cleaning an Edwardian Tiled Floor

Our first task was to protect the area surrounding the tiles from splashing by applying a protective polythene tape to the thresholds and door fronts etc. We then started preparing the floor for cleaning by removing the glue that was used to hold the carpet gripper to the tiles. A sharp blade was used to carefully scrape the adhesive off the tile and then the area was spot treated using a strong dilution of Tile Doctor Remove & Go which was left to soak into the tile for ten minutes before being scrubbed by hand.

With the adhesive removed the whole floor was given a thorough clean using a strong dilution of Tile Doctor Pro Clean. The cleaning solution was left to soak in for ten minutes and then they were scrubbed with floor pads fitted to a rotary buffer machine and then by hand with stiff brushes. The floor was then rinsed, and steam cleaned with the soiled extracted off the floor using a wet vacuum.

We managed to take a photo as seen below showing the floor half way through the cleaning stages.

Edwardian Hallway During Cleaning Muswell Hill

Repairing a Victorian Tiled Hallway Floor

Whist carrying out the repairs to inside the front door we uncovered a distressed surface underneath the tiles, probably from all the foot traffic walking over it for so many years which required some much-needed attention. After carefully taking out the required number of tiles and setting those aside we had to lay a new covering of cement and insert stainless steel mesh plates to level the floor.

Edwardian Hallway Before Restoration Muswell Hill Edwardian Hallway After Cleaning and Repair Muswell Hill

After the installation of the tiles, the floor was re grouted and thoroughly cleaned and left to dry off overnight.

Sealing Edwardian Style Tiles

We returned the next day to seal the floor, first checking to ensure the tiles had dried out overnight. To start the sealing, we applied a single coat of Tile Doctor Colour Grow with leaves a matt finish and left it to dry. Colour Grow is an impregnating sealer that provides stain protection whilst enriching the colour of the tiles in the process.

Edwardian Hallway After Sealing Muswell Hill
Once the first coat was dry it was followed by the application of six coats of Tile Doctor Seal & Go which adds further layers of protection but leaves a satin finish that gives a rich, natural appearance and works really well on Victorian and Edwardian tiles.

Edwardian Hallway After Sealing Muswell Hill
 

Restoring Edwardian Hallway Tiles in North London

Edwardian Tiled Hallway Floor Restored in Muswell Hill, London Read More »
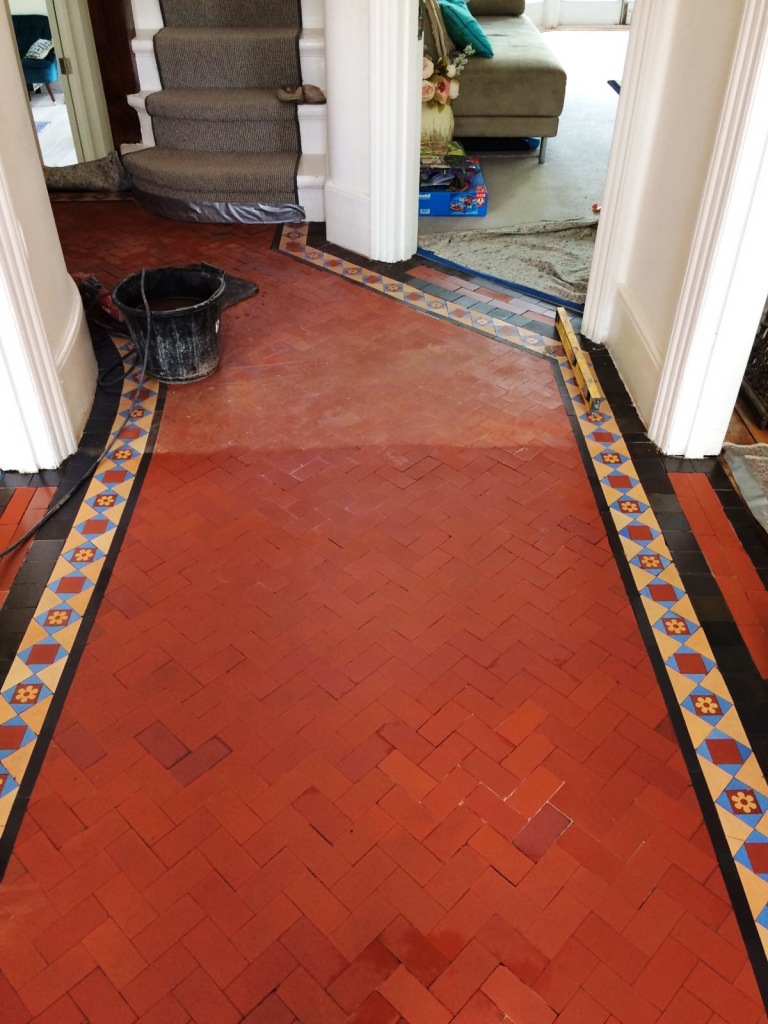
Victorian Hallway Before and After Restoration and Repair Bounds Green

Tessellated Victorian Hallway Restoration in Bounds Green, North London

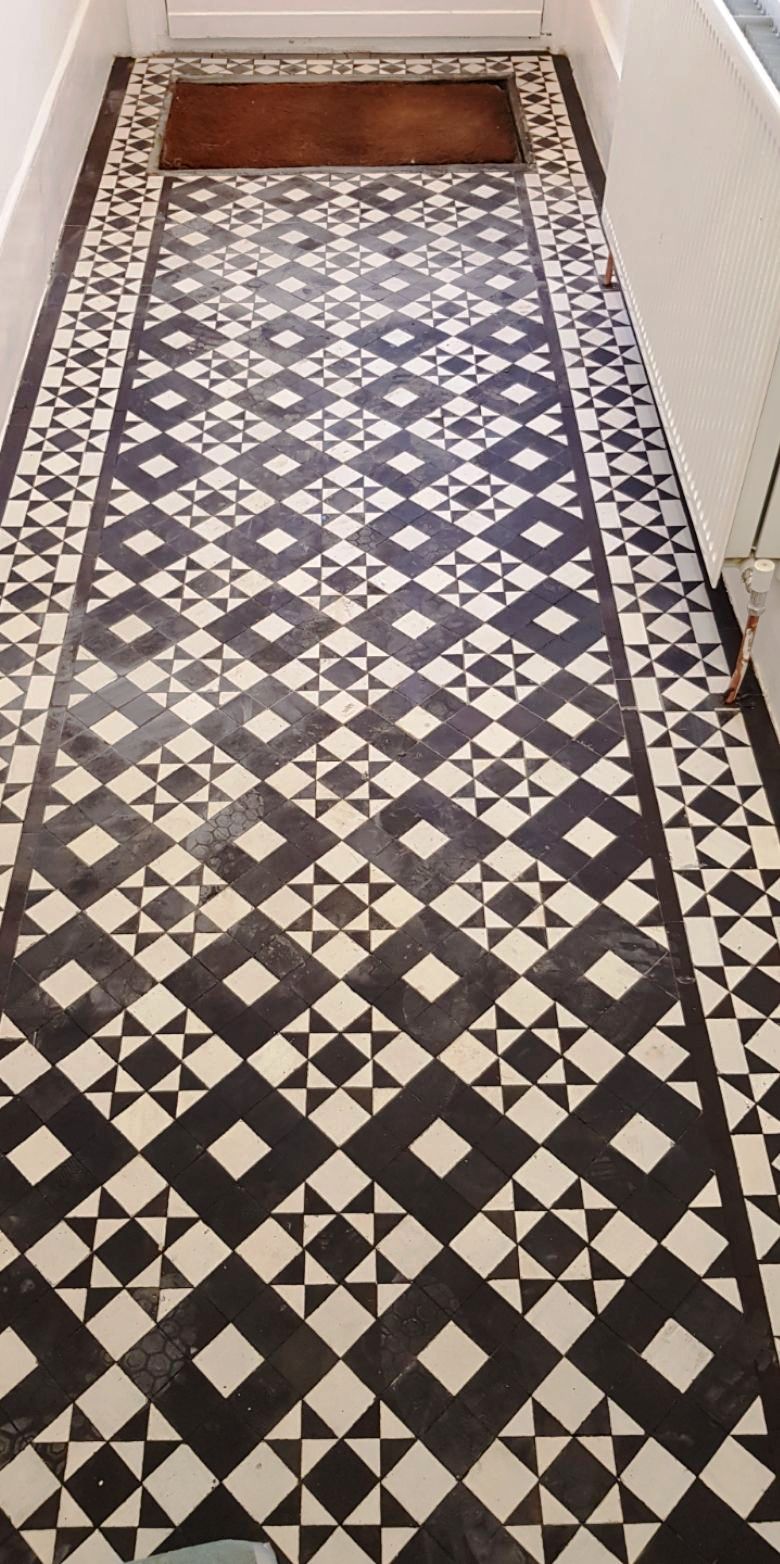
Bounds Green in North London has more than its fair share of Victorian terraced houses packed with desirable original features. When the owners of this house pulled up their hallway carpet they were excited to discover a beautiful and original black and white Tessellated tiled floor.

Victorian Hallway Before Restoration and Repair Bounds Green Lifting Carpet Victorian Hallway Before Restoration and Repair Bounds Green

Tessellated tiled floors became fashionable from the 1860s and usually featured striking geometric patterns. By the end of the century they had become an essential feature in the most ordinary Victorian terraced houses from Dover to Aberdeen. They fell out of fashion in the 1960s and 70s and were usually covered over with carpet or linoleum, but period house owners today understand their value and are restoring them back their former glory. A well-restored tessellated tiled floor not only looks incredibly attractive but is durable and hard wearing. They were originally laid by highly skilled tillers and most have already survived 100 years of family wear and tear. With the right care they will probably be good for another 100 years.

Restoring a Victorian Tessellated Tiled Floor

The first thing we did was cut away the rest of the carpet to expose the whole hallway. The floor looked in a relatively stable condition, but it was clear the floor needed a deep clean and some minor repairs.

Victorian Hallway Before Restoration and Repair Bounds Green Victorian Hallway During Restoration and Repair Bounds Green

We started off by cleaning off each individual tile with Tile Doctor Remove and Go, a multi-purpose stripper that also draws out ingrained stains and removes old sealers and coatings; this took away all the glue and dirt from the carpet. We then applied Tile Doctor Nanotech HBU which is specially designed to penetrate below tough stains, dissolve and lift them out. We left that for twenty minutes for maximum effect before lightly scrubbing. Each tile was then individually scrapped with polypropylene pads.

The next step was to remove the resultant soil by rinsing with water and extracting with a wet vacuum. We steamed cleaned each tile and carried out a second clean with Tile Doctor Pro-Clean which is a strong cleaner and degreaser for heavily soiled and neglected tile, stone and grout that has been neglected or subjected to heavy use.

By now the floor was looking pretty good. The beautiful black and white design of the floor was once again in evidence after decades of being hidden under carpet. There were just a few more steps to complete the job and restore this floor to its original glory. We carried out the minor repairs needed, carefully re-grouted the very fine gaps between the tiles and left the floor overnight for the grout to thoroughly dry.

Sealing a Victorian Tessellated Tiled Hallway Floor

The next day we sealed the tiles with five coats of Tile Doctor Seal and Go to give a beautiful and natural low-sheen satin finish. This specially formulated solution also provides a stain resistant surface seal and being water based it doesn’t leave a smell as it dries.

Victorian Hallway After Restoration and Repair Bounds Green
We managed to complete the whole job in just under two days with two of our skilfully-trained technicians. Our customer was delighted with the outcome and left the following message for us on the Tile Doctor feedback system:

“The team worked hard at what seemed a fiddly job and we are very pleased with the outcome. I would recommend.” Natalie G, Bounds Green, London”

Victorian Hallway After Restoration and Repair Bounds Green
 

Professional Tessellated Victorian Hallway Floor Restoration in North London

Tessellated Victorian Hallway Restoration in Bounds Green, North London Read More »

Damaged Victorian Tiled Hallway Floor Before and After Restoration Winchmore Hill London

Restoring a Damaged Victorian Tiled Hallway in Winchmore Hill

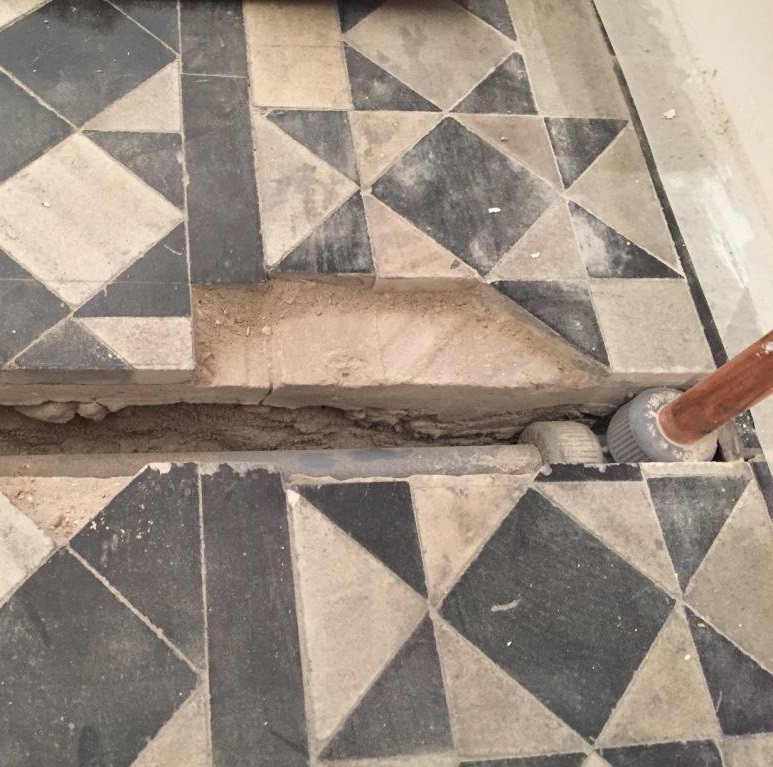
A customer in Winchmore Hill which is part of the London borough of Enfield was having major refurbishment works done to their home which included an upgrade to the central heating system. As part of the work a new radiator had been installed in the hallway however the utility company when putting in the new heating system had chased out two deep pipe channels in the central part of their beautiful Victorian tiled hallway floor.

Victorian Hallway Before Restoration Winchmore Hill Cropped Victorian Hallway Before Restoration Winchmore Hill

This was a real shame as the majority of the floor was in good condition; the owner of course wanted the floor restored so our brief was to do exactly that and carry out repairs to the pipe channels and to all the door thresholds that were either existing or new so they all matched in.

Restoring a Victorian Tiled Hallway

Our first task was to clean the tile and grout and strip off old sealers and waxes which we did by applying a dilution of Tile Doctor Remove & Go combined with equal part of Tile Doctor Pro-Clean. This was scrubbed into the floor with a black scrubbing pad fitted to a rotary machine and then rinsed off with water and extracted with a wet vacuum.

Victorian Hallway During Restoration Winchmore Hill
After deep cleaning we then carried out the tile repairs and replacements to pipe channels, missing and mislaid tiles to thresholds. Some or the tiles were replaced with matching reclaimed tiles and others were new sourced from Original Style who have a large range. Altogether we replaced circa 500 pieces of tile in order to repair the damage caused by the heating engineers and achieve a consistent pattern throughout the hallway.

Sealing Victorian Tiles

The cleaning and re-tiling work was carried out over three days and we returned on the fourth day to seal the floor with an initial two coats of Tile Doctor Colour Grow which is an impregnating sealer that enhances colour.

We then protected the floor for a further week with cardboard cut to size, this allowed other trades to finish their work without messing up the floor. A week later we returned to lift the cardboard to apply the finishing seal using Tile Doctor Seal & Go which adds the final protection. Five coats were applied to reach the right level of protection and desired satin finish restoring the natural appearance and lustre of the tiles.

Victorian Hallway After Restoration Winchmore Hill Cropped Victorian Hallway After Restoration Winchmore Hill

The whole job allowing for the drying times of adhesive, grout and sealing took five days in total. It was worth it though as restored Victorian hallway really gives the property the Wow factor as you enter.

Victorian Hallway After Restoration Winchmore Hill
 

Victorian Tiled Hallway Restoration in North London

Restoring a Damaged Victorian Tiled Hallway in Winchmore Hill Read More »
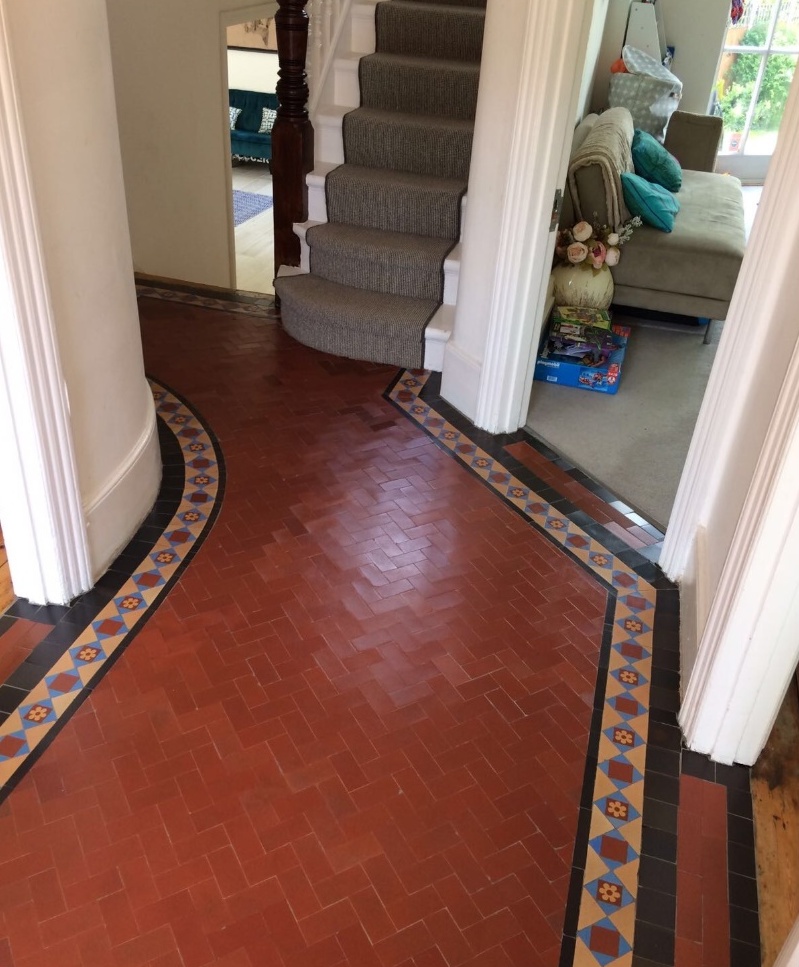
Edwardian Hallway Floor Before and After Restoration Crouch End

Edwardian Tiled Hallway Floor Restored in Crouch End, London

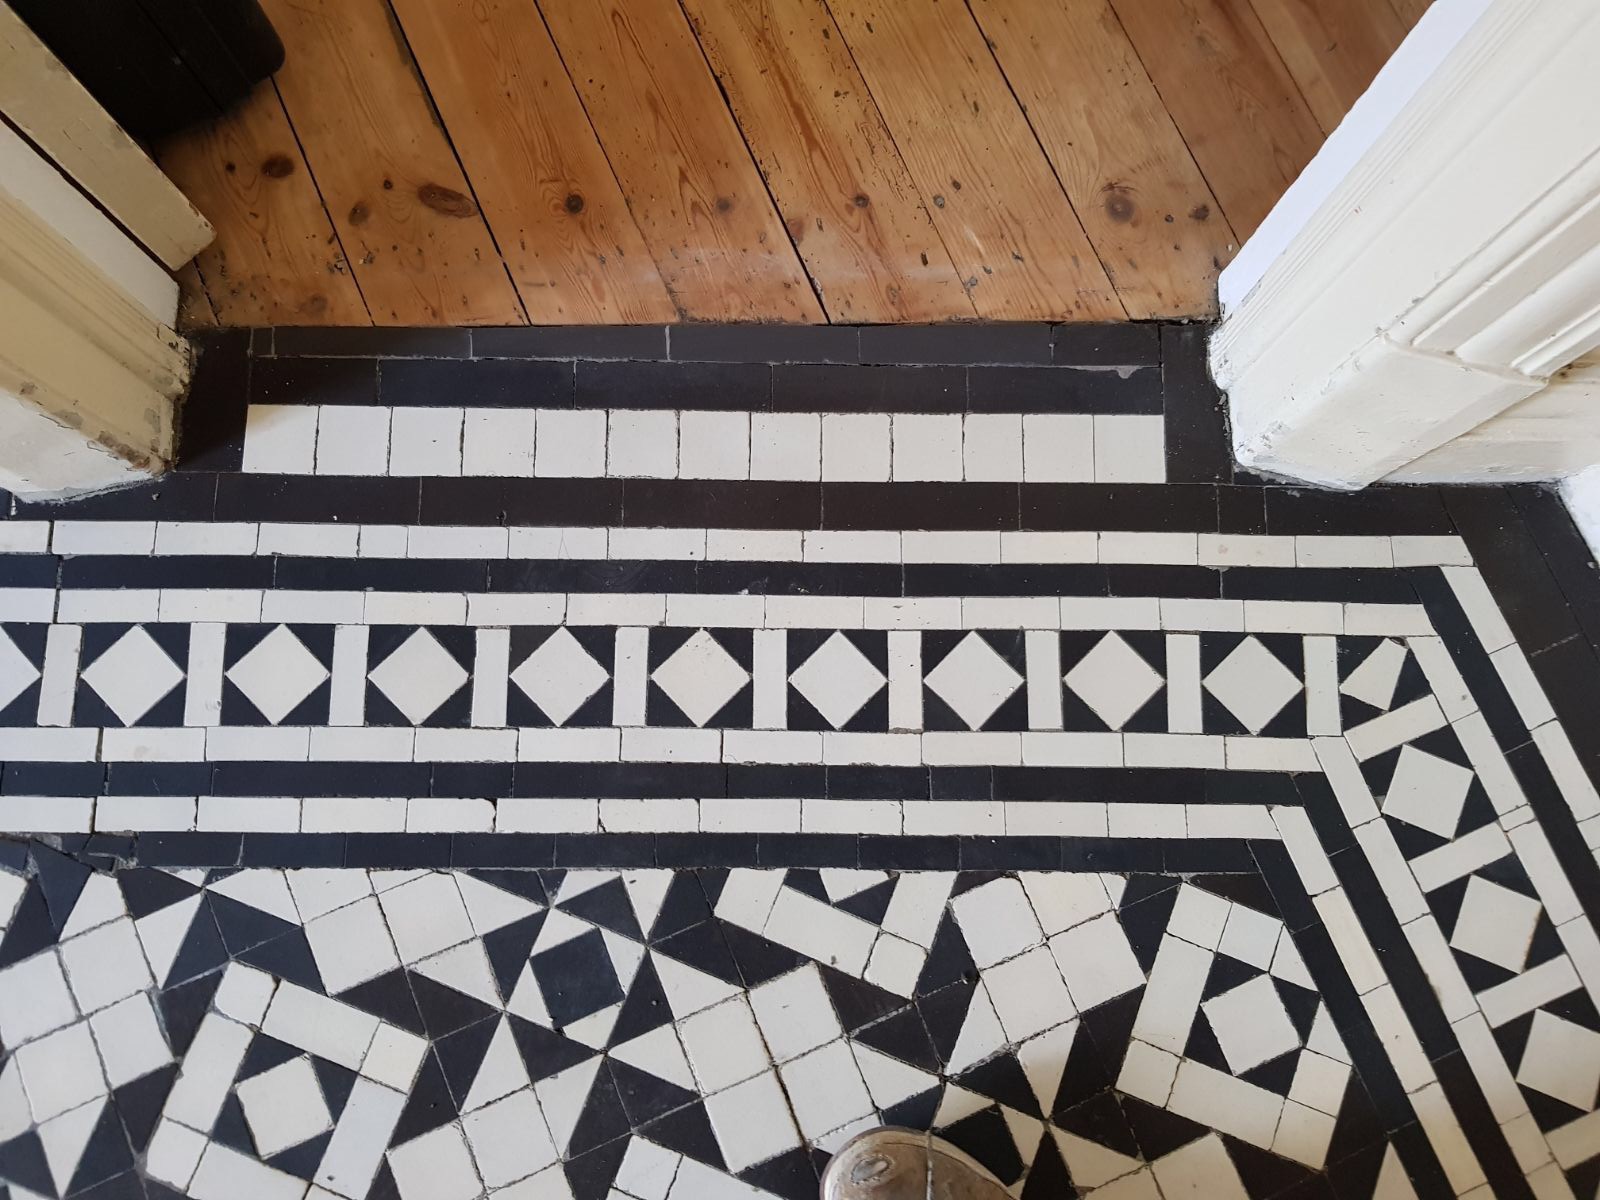
Pictures below of an original Edwardian Tiled Hallway at a house in Crouch End, North London. Victorian and Edwardian properties are quite common in the area which actually dates to the 13th Century and is often used in the filming of East Enders.

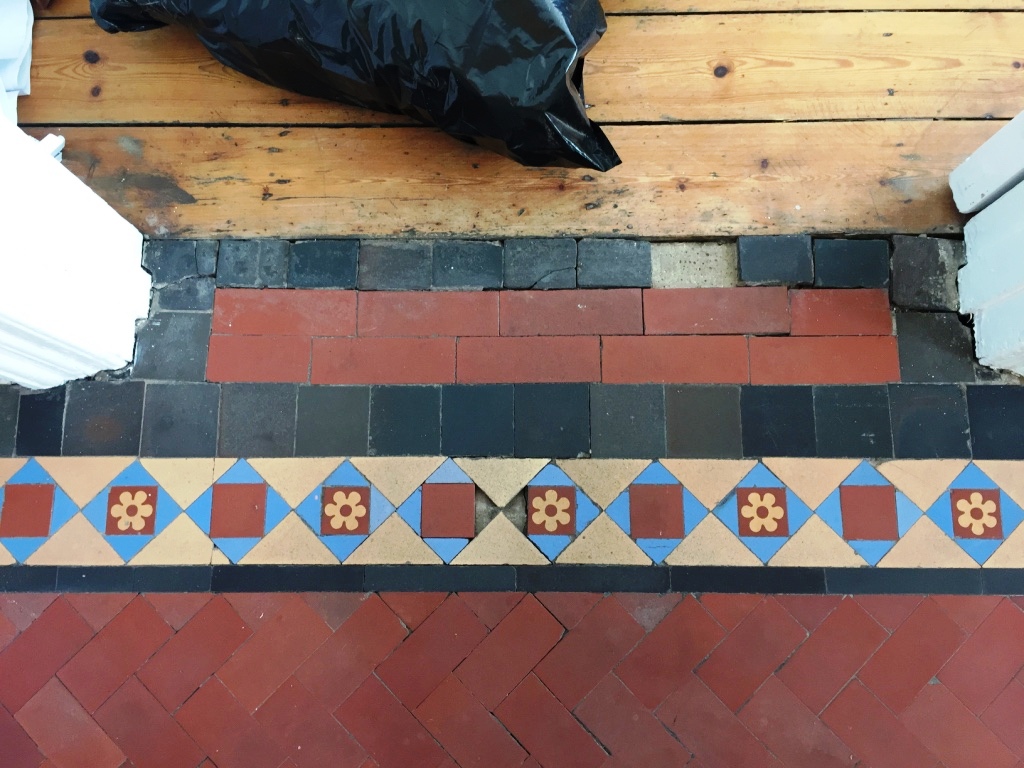
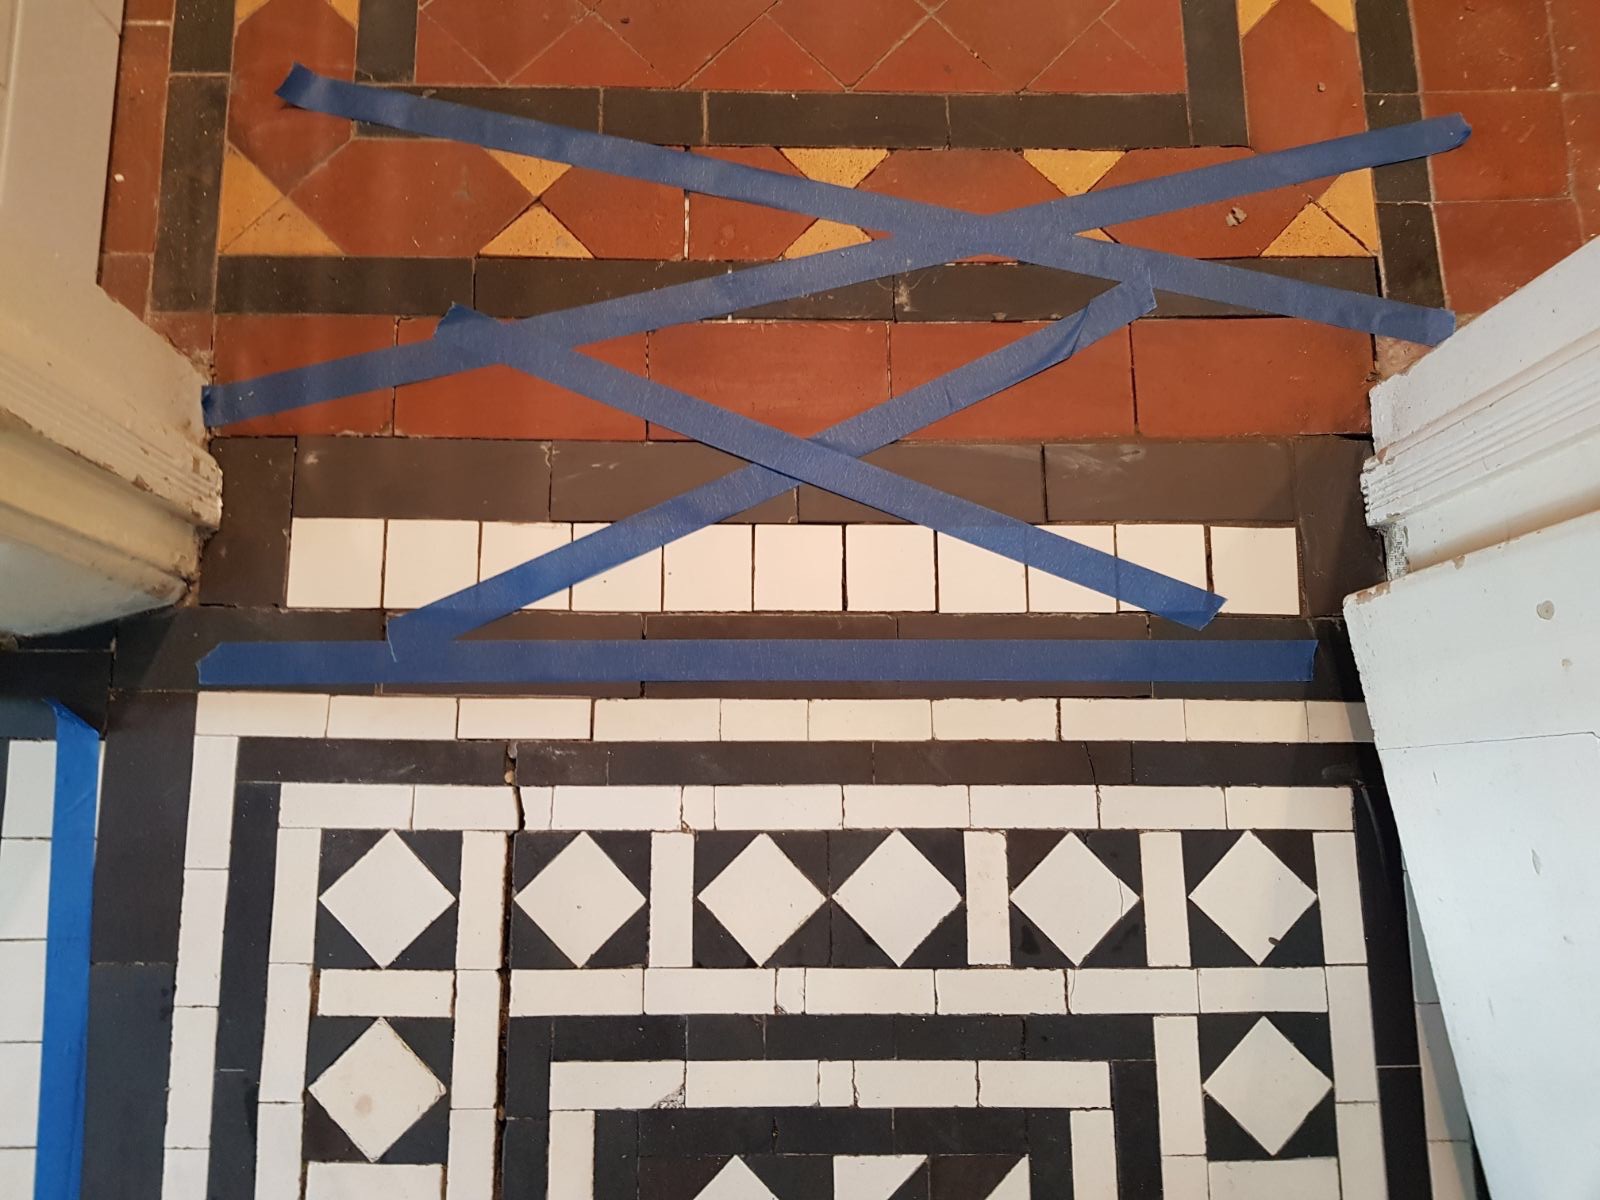
We were called in to look at restoring the floor back to its former glory and when inspecting and surveying the floor we found large sections of tiles that were loose and three doorway thresholds that required rebuilding and re-tiling. If you have been following our website posts, you will know this is something we specialise in, so we were more than happy to help.

Edwardian Hallway Threshold Before Restoration Crouch End

Restoring an Edwardian Tiled Floor

Before cleaning the floor our first task was to remove the loose, damaged, cracked and broken tiles. These were set aside and those that could be re-used were cleaned prior to re-laying. The remaining tiles were then cleaned using Tile Doctor Remove & Go to remove the old waxes and seals.

Edwardian Hallway Floor Before Restoration Crouch End
Over the course of three days we worked in small areas of about a metre square at a time. After cleaning the tiles were then fully rinsed and steam cleaned and left to dry. In the meantime, we began the repairs to the thresholds and central part of the floor.

After the installation of the new and reclaimed tiles the floor was re grouted using Mapei grey grout and thoroughly cleaned and left to dry overnight.

Sealing Edwardian Style Tiles

We returned the next day to seal the floor, first checking to ensure the tiles had dried out overnight. To start the sealing we applied a single coat of Tile Doctor Colour Grow and left it to dry. Colour Grow is an impregnating sealer that provides stain protection whilst enriching the colour of the tiles in the process.

Edwardian Hallway Threshold During Sealing Crouch End
Once the first coat was dry it was followed by the application of six coats of Tile Doctor Seal & Go which is a protective Satin Seal that gives a rich, natural appearance and works really well on Victorian and Edwardian tiles.

Edwardian Hallway Threshold After Restoration Crouch End
In total the work took four days to complete and we relayed around 450 tiles in the process. Before leaving we advised our customer on how best to maintain the appearance and increase longevity of the sealer.

Edwardian Hallway Floor After Restoration Crouch End
 

Restoring Edwardian Hallway Tiles in North London

Edwardian Tiled Hallway Floor Restored in Crouch End, London Read More »

Victorian Tiled Hallway Floor Before and After Full Restoration in Woodford Green

Victorian Tiled Hallway Hidden Under Carpet Fully Restored in Woodford Green

This lovely Victorian Tiled Hallway was discovered by a couple during the renovation of their home in Woodford Green which is a suburb of Woodford in North East London. The tiles were covered by a hallway carpet and much of it was obscured by concrete floor leveller. Fortunately just enough of the tile was exposed to give an indication of the Black and White Victorian floor underneath.

After initial investigation and discussion on what was possible, we were invited to quote to restore the floor which I’m pleased to say was accepted. The following pictures show an indication of the process we followed to restore the hallway to its former Victorian glory.

Cleaning Victorian Hallway Tiles

The first step was to remove the concrete floor levelling compound which was done very carefully using small hand tools, detail blades and scrapers. This took a lot of work as we did not want to damage the tiles underneath. You can get a feeling for this from the photographs below where we slowly remove the concrete layer over the floor to reveal the Victorian floor underneath.

Removing Concrete Leveller From Victorian Floor Tiles in Woodford Green Removing Concrete Leveller From Victorian Floor Tiles in Woodford Green

Once the Victorian tiles were all uncovered and the cement had been removed we got a good idea of the condition of the tiles and began a deep clean restorative process. The process began by giving the floor an acid wash with Tile Doctor Grout Clean-Up which was left to dwell on the tile for ten minutes before being scrubbed in to release remaining smears of concrete and grout residue on the tiles.

The resultant soil was then removed with a wet vacuum and the floor then cleaned with Tile Doctor Pro-Clean using a similar technique of leaving it to dwell and then scrubbing it in.

Cleaning Victorian Hallway Floor Tiles in Woodford Green
Once cleaned the soiled cleaning product was removed with a wet vacuum and the floor give an thorough rinse with fresh water which was followed by a steam clean to finalised the process.

Cleaning Victorian Hallway Floor Tiles in Woodford Green
With the floor now deep cleaned we moved on to addressing the three door thresholds which needed to be rebuilt to fix loose and replace broken tiles.

Victorian Hallway Floor Tile Threshold After Cleaning in Woodford Green

Sealing Victorian Hallway Tiles

The tiles were left to dry and set overnight and we returned later to seal them with an initial coat of Tile Doctor Colour Grow, an impregnating seal as a primer before re-grouting. Colour Grow is an impregnator that seeps into the pores of the tile protecting it from within and also enhancing the colours in the tile.

Victorian Hallway Floor Tiles Regrouting in Woodford Green
Once the sealer had dried we moved on to grouting those areas which were repaired the previous day with a matching grout colour and then this was left to set

When the grout was set it was time to finish off the sealing this time using five applications of Tile Doctor Seal & Go to provide a natural sheen finish.

Victorian Tiled Hallway Floor After Full Restoration in Woodford Green
As you can see from the picture, the floor has been fully restored to its original condition and with the correct maintenance; it should last for years to come.

Full Restoration of Victorian Hallway Tiles in North London

Victorian Tiled Hallway Hidden Under Carpet Fully Restored in Woodford Green Read More »

Edwardian Clay Pathway Barnet Before and After Cleaning

Edwardian Clay Tile Front Pathway in Barnet

As you can see this Clay Tiled Pathway laid during the Edwardian period at the front of a house in Barnet, North London had suffered over the years and now had many broken and cracked tiles along the path. The concrete foundation had seen some movement in the past leading to a crack forming right across which had either cracked the tile or caused them to become loose.

Edwardian Clay Pathway Barnet Before Cleaning Edwardian Clay Pathway Barnet Before Cleaning

To restore the path to its original condition would require removing all the broken and loose tiles and then relaying with matching replacements and grout giving particular attention to the detailed edging pattern. Fortunately, having done a few of these jobs before I have learned where to find replacements and often keep an eye on salvage yards and ebay.

Edwardian Clay Pathway Barnet Before Cleaning Edwardian Clay Pathway Barnet Before Cleaning

Cleaning and Repairing an Edwardian Clay Tiled Pathway

The first job was to remove ingrained dirt and old coatings by applying a strong dilution of Tile Doctor Remove & Go across the entire length of the pathway. Remove and Go as its name suggests breaks down and strips off the old sealers as well as dislodging ingrained dirt. It was scrubbed in and then rinsed off with water and extracted using a wet vacuum.

Next some of the tiles which had experienced particularly stubborn staining were given an Acid Wash using Tile Doctor Acid Gel which removes old grout smears and mineral salts deposits which is often referred to as efflorescence. Acid Gel neutralises the alkaline salts and once scrubbed in it was removed using the wet vacuum.

Once the dirt and efflorescence had been dealt with, I focused my attention towards the tile repairs starting with the removal of the broken and loose tiles so I could get at the cracked sub-base and repair it. Once the repair had hardened I was able to relay the path using a mixture of exiting and replacement tiles taking care to match the original pattern. Before leaving for the day the tile adhesive had gone off and I was able to grout them in using a matching grout. I had also checked the weather forecast to ensure no rain was forecast that evening.

Sealing an Edwardian Clay Tiled Pathway

The weather held and the following day with a freshly cleaned and repaired path I was able to finish the job by applying two coats of Tile Doctor Colour Grow which really brings out the natural colours in the clay tile. Once the sealer had dried I ran a white buffing pad over the path to give it that final finish before showing it to the owner of the property who I’m happy to report was extremely pleased with the result.

Edwardian Clay Pathway Barnet After Cleaning
I should mention that when choosing a Sealer for an external application it’s important to choose one which is fully breathable and can cope with the wet conditions.

Victorian Tiled Pathway and Edwardian Tiled Hallway Restored in Palmers Green

Edwardian Clay Tile Front Pathway in Barnet Read More »

Edwardian Hallway Floor Before and After Tile Cleaning Islington

Edwardian Style Hallway Floor Cleaned and Repaired in Islington, London

This customer from Islington in North London had an Edwardian Black and White tiled hallway in need of repair and restoring.

Edwardian Hallway Floor Before Tile Cleaning Islington
To restore the lustre of the Edwardian floor tiles the floor would need what was left of the old sealer stripped off, tiles deep cleaned, the replacing of missing and broken tiles and finally applying an impregnating colour restoring products and a protective sealer. You will full details of how this was done below.

Edwardian Hallway Floor Before Tile Cleaning Islington

Cleaning Edwardian Style Tiles

Before starting we covered the skirting, doors and threshold areas with protective tape. Then to remove what was left of the old sealer and clean the floor the area was left to soak in a strong solution of Tile Doctor Remove and Go for about ten minutes. It was then scrubbed into the tile using a slow speed orbital floor machine fitted with a black scrubbing pad and also hand held brushes to get into the corners and other tricky areas.

The now soiled cleaning solution did a good job removing the dirt and old sealer and was rinsed away using water and then extracted with a wet vacuum. The tile and grout was inspected and the process repeated where required before giving the floor a final rinse to remove any trace of cleaning product. It was getting late at this point so the floor was left to dry off thoroughly overnight.

Sealing Edwardian Style Tiles

On our return we first carried out a number of restorative tile repairs using matching Edwardian reclaimed tile replacements primarily to the door thresholds and skirting board edges. Before grouting we applied a single coat of Tile Doctor Colour Grow sealer to the whole floor as this would make any excess grout easier to remove. Colour Grow is also a breathable sealer that impregnates into the pores of the tile protecting it from within and also enhancing the colours in the tile.

We had to leave the floor for another day primarily to allow the grout to dry before returning the next day to complete the sealing process this time using six coats of Tile Doctor Seal and Go which adds a lovely sheen and works really well on Edwardian floor tiles.

Edwardian Hallway Floor After Tile Cleaning Islington
As you can see from the picture, the floor has been restored to its original condition and with the correct maintenance; it should last for years to come.

Edwardian Hallway Floor After Tile Cleaning Islington
 

Restoring Edwardian Hallway Tiles in North London

Edwardian Style Hallway Floor Cleaned and Repaired in Islington, London Read More »

Scroll to Top